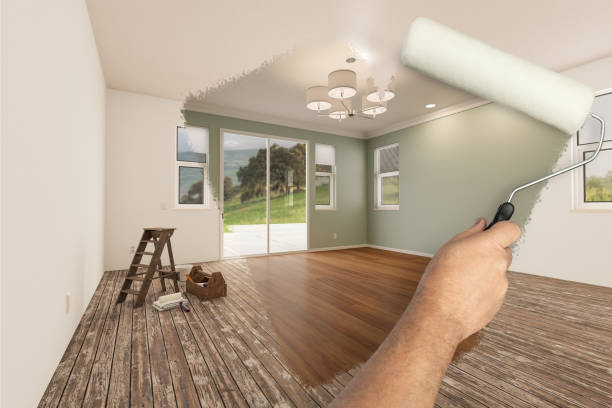
Painting your home is one of the most transformative and cost-effective ways to breathe new life into your living space. For new homeowners, embarking on this journey can feel overwhelming. However, with some foundational knowledge, you can achieve professional-looking results while adding character and personality to your home.
Assessing the Scope of Your Project
- Which rooms or surfaces require painting? This includes walls, ceilings, trim, doors, and potentially cabinets.
- What condition are the surfaces in? Damaged walls may need repairs such as patching holes or sanding rough areas before painting.
- What’s my timeline? Some projects can be completed in a weekend, while others may take weeks depending on size and complexity.
Essential Supplies for a Successful Paint Job
- Quality paint (interior or exterior as needed)
- Primer (for bare or dark surfaces)
- Paint rollers with covers
- Angled brushes for edges and detailed work
- Painter’s tape for clean edges
- Drop cloths to protect floors and furniture
- Sandpaper or sanding blocks
- Spackle for filling cracks or holes
- Rags or microfiber cloths for cleaning surfaces before painting
- A bucket of mild soapy water for wiping away dust and grease stains
- Safety goggles (especially when sanding)
- A mask/respirator if working in poorly ventilated spaces or using strong-smelling paints
Prepping Your Space Before Painting
- Clean Surfaces: Dirt, grease, and dust can interfere with paint adhesion. Use a damp cloth or cleaning solution appropriate for the surface type.
- Patch and Sand Imperfections: Small cracks or nail holes should be filled with spackle and sanded smooth once dry.
- Protect Surrounding Areas: Use painter’s tape along moldings, trim, windowsills, and other areas where you want clean lines.
- Prime When Necessary: Certain situations require primer—especially when covering dark colors with lighter shades or painting over textured walls.
Choosing the Right Paint Type
| Paint Type | Best For | Finish Options |
| Latex (Water-Based) | Interiors; easy cleanup | Matte, satin, semi-gloss |
| Oil-Based | Trim; durability in high-use areas | Glossy finishes |
| Enamel | Cabinets; resistant to wear | High-gloss |
Each type has its advantages depending on usage needs and area-specific requirements.
Setting Realistic Expectations
Painting requires time and patience—rushing through preparation or application processes often leads to unsatisfactory results.
- Allow sufficient drying time between coats (check manufacturer recommendations).
- Plan breaks based on project complexity; tackling one room at a time reduces stress.
- Test small color samples before committing—they may appear different under various lighting conditions.
By following these steps methodically during your first home-painting project as a homeowner ensures both aesthetically pleasing results while protecting long-term investments like walls flooring etc
Choosing the Perfect Interior & Exterior Painting Perrysburg OH to Match Your Vision and Style
Selecting the right paint colors for your home can be a transformative experience, shaping not only the aesthetics but also the mood of your living space. A well-chosen palette brings harmony, reflects your personality, and creates an environment where you feel comfortable. Here’s a guide to help you make informed choices that align with your vision and style.
Understand the Basics of Color Theory
- Primary colors: Red, blue, and yellow are foundational hues.
- Secondary colors: Mixing primary colors creates green, orange, and purple.
- Tertiary colors: Combining primary and secondary shades results in more nuanced hues (e.g., teal or mustard).
The color wheel is a useful tool for exploring relationships between hues: – Complementary colors: Opposite each other on the wheel (e.g., blue and orange) create high contrast. – Analogous colors: Side-by-side shades (e.g., green, blue-green) deliver a harmonious look. – Monochromatic schemes: Variations of one color create depth without overwhelming the space.
Assess Your Space
Your choice of paint should be influenced by your home’s architecture, layout, lighting, and surrounding décor. Consider these factors:
1. Natural Lighting
– North-facing rooms often receive cooler light. Warm tones like beige or soft yellows can balance this out. – South-facing rooms may benefit from cooler shades like light blues or greens to counteract intense sunlight.
- Light colors can make small spaces feel larger by reflecting light.
- Darker shades add coziness but may make compact areas feel enclosed if overused.
- Pay attention to furniture, flooring, cabinetry, or stonework already present in your home to ensure complementary choices.
Define Your Style
Your personal style is key in narrowing down options: – For a modern minimalist aesthetic, opt for neutral tones such as whites, grays, or taupes with subtle accents. – If you gravitate toward a bold contemporary look, incorporate vibrant hues like emerald green or cobalt blue as statement walls. – Fans of a classic traditional design might prefer timeless shades like navy blue or muted creams.
Tips for Testing Paint Options
Never commit to a color based solely on online images or swatches at hardware stores. Test paints properly using these methods: 1. Purchase sample pots of your favorite selections. 2. Paint small sections on multiple walls within the room to see how lighting affects each hue. 3. Allow painted areas to dry fully before evaluating – wet paint often appears different than its final finish.
| Time of Day | Light Source | Color Appearance Should Be Evaluated |
| Morning | Natural sunlight | Check brightness & clarity |
| Afternoon | Mixture of natural/artificial light | Observe balance |
| Evening | Artificial lighting only | Evaluate warmth/brightness shifts |
Trends vs Timeless Choices
While staying up-to-date with trends can be exciting (e.g., earthy terracotta tones or deep greens), focus on what resonates with your vision rather than fleeting fads. Timeless neutral palettes can serve as excellent backdrops while allowing you flexibility with décor updates.
By combining insights from design principles with personal preferences and practical considerations (such as lighting), you’ll achieve an atmosphere uniquely suited to your home aspirations without compromise.
Bright, Bold, or Neutral: A Comprehensive Guide to Color Choices for Your Home
Selecting the right paint colors for your home is essential in setting the tone and mood of each space. Whether you want to create a calming retreat or make a bold statement, understanding how bright, bold, and neutral colors impact your living environment can help you make informed decisions. Below is an in-depth guide to these color categories and their potential applications.
Bright Colors: Energize and Uplift
Bright colors bring energy and vibrancy into a space. They reflect more light and can make smaller rooms appear larger and more welcoming. However, they need to be used thoughtfully to avoid overwhelming the senses.
Key features of bright colors: – Popular shades: Sunny yellows, sky blues, fresh greens
– Best suited for: Kitchens, children’s playrooms, or areas where you want to boost activity levels
– Pairing tips: Balance bright walls with neutral or muted furniture for contrast
Bright color combinations: | Primary Color | Accent Color Suggestions | Ideal Room Type | |—————|—————————|———————–| | Yellow | White, Gray | Kitchen or Breakfast Area | | Aqua Blue | Beige, Gold | Bathrooms | | Lime Green | Charcoal Gray | Home Office |
Bold Colors: Make a Statement
Bold colors are perfect for creating focal points or adding drama to living spaces. They evoke confidence but require careful application to avoid making rooms feel small or overwhelming.
Key features of bold colors: – Popular shades: Deep reds, royal blues, emerald greens
– Best suited for: Accent walls in living rooms, dining rooms, or bedrooms
– Pairing tips: Use bold hues sparingly and complement them with softer tones
Tips for using bold colors effectively: 1. Paint one accent wall instead of all four walls. 2. Use bold shades in large spaces with ample natural light. 3. Incorporate complementary décor such as rugs or artwork.
Neutral Colors: Timeless Versatility
Neutral paint options offer simplicity and sophistication while serving as the perfect blank canvas for other design elements like furniture and accessories.
Key features of neutral colors: – Popular shades: Whites, beiges, greiges (gray-beige), taupes – Best suited for: Living rooms, bedrooms, hallways—any area where flexibility is key – Pairing tips: Add texture through patterned rugs or wooden furniture
Advantages of neutrals: – They create an illusion of spaciousness. – Ideal if you’re planning frequent décor changes. – Easy resale value since they appeal to a wider audience.
Neutral color undertones chart: | Base Color | Undertone Options | Resulting Effect | |————–|—————————–|———————–| | Gray | Blue | Cool and calming | | Beige | Pink | Warm and inviting | | White | Yellow | Softened brightness |
Finding the Right Balance
Mixing bright, bold, and neutral tones across your home can ensure variety without sacrificing cohesion. For instance: – Pair a neutral base palette with pops of brighter hues through accent pieces like cushions or wall art. – Offset a boldly painted room by keeping adjoining spaces light-colored.
By understanding the emotional impact and practical applications of each type of color choice—bright for energy, bold for drama, neutral for versatility—you’ll be better equipped to create a cohesive home that reflects your personal style while maintaining functionality.
Expert Tips for House Painting Perrysburg OH Without Breaking the Bank or Losing Sleep
Painting your house is an excellent way to breathe new life into your space without embarking on a costly renovation. However, the process can feel overwhelming, especially if you’re trying to stay within a budget and maintain your peace of mind. With careful planning and smart strategies, you can transform your home effectively and affordably. Below are expert tips to help you navigate this project.
Plan Your Budget
- Calculate wall space: Determine how much paint you’ll need by measuring the square footage of walls and ceilings.
- Choose economical brands: Not all high-quality paints are expensive; look for mid-range options that provide durability.
- Factor in supplies: Include brushes, rollers, painter’s tape, drop cloths, and other materials in your budget.
| Item | Estimated Cost |
| Paint (per gallon) | $20-$60 |
| Brushes/Rollers | $5-$15 each |
| Painter’s Tape (roll) | $3-$6 |
| Drop Cloths | $10-$20 |
Prep Like a Pro
Preparation is key to saving both time and money during painting projects. Proper prep work ensures smoother finishes and fewer costly mistakes.
- Clean surfaces thoroughly: Dusty or greasy walls affect paint adhesion.
- Repair imperfections: Patch holes and cracks with spackle or filler before priming.
- Use primer wisely: A primer may seem like an extra expense, but it reduces the number of paint coats needed—saving time and money.
Choose Quality Over Quantity
It might be tempting to opt for cheaper paint; however, lower-quality paints often require more coats to achieve coverage. Investing in quality products can lead to better results while minimizing waste.
Benefits of High-Quality Paint:
- Better coverage: Reduces the number of coats required.
- Durability: Resists wear and tear over time.
- Ease of application: Applies smoothly with fewer streaks.
DIY vs Professional Help
Deciding whether to tackle painting yourself or hire professionals depends on your skill level, available time, and budget.
Pros of DIY:
- Cost savings on labor fees.
- Full control over the timeline.
Cons of DIY:
- Time-intensive if you’re inexperienced.
- Greater risk of errors like uneven coatings or drips.
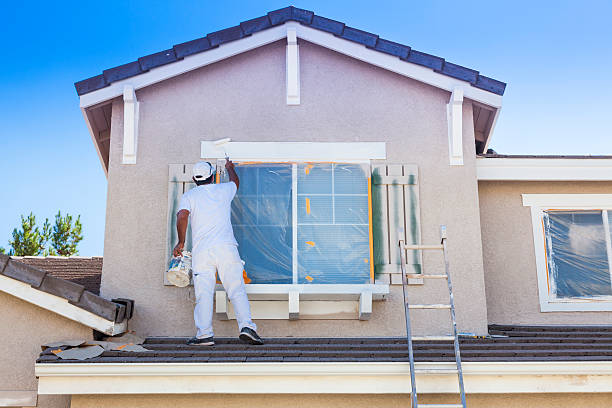
When Hiring Professionals Makes Sense:
- Large-scale projects like exterior painting.
- Detailed work such as intricate trims or textured walls.
Work Smarter with Time-Saving Techniques
- Paint one room at a time rather than multitasking across several areas.
- Use tools such as extension poles for hard-to-reach ceilings.
- Apply paint in “W” patterns with rollers for even distribution.
By implementing these strategies thoughtfully, you’ll be able to complete your house-painting project efficiently while staying on budget—and sleeping soundly at night knowing you’ve made smart choices throughout the process!
The Best Time of Year to Paint Your Home for Optimal Results
Timing is a critical factor when it comes to painting your home. Certain seasons and environmental conditions can significantly impact the quality, durability, and success of a paint job. Understanding the best time of year to paint your home ensures not only a more efficient process but also long-lasting results. Below is an in-depth guide on when and why timing matters when undertaking this transformative project.
Factors That Influence Painting Conditions
- Ideal temperature ranges for painting typically fall between 50°F and 85°F (10°C–29°C).
- Extreme temperatures, either too hot or too cold, can cause paint to dry unevenly or not adhere properly to surfaces.
- High humidity slows down drying times and may lead to issues like blistering or peeling.
- Aim for a humidity level below 50% whenever possible.
- Rain can wash away freshly applied paint or saturate surfaces, making it harder for new coats to bond effectively.
- Always check the weather forecast before beginning any outdoor painting projects.
- High wind during application can result in overspray, uneven coverage, or even dust settling onto wet surfaces.
Ideal Seasons for Painting
| Season | Pros | Cons |
| Spring | Moderate temperatures and lower humidity levels | Unpredictable rain patterns in some regions |
| Summer | Warm weather accelerates drying times | Heat waves may lead to premature drying or cracking |
| Fall | Cooler weather with stable conditions | Shorter daylight hours reduce working time |
| Winter | Suitable in mild climates with proper indoor heating | Not ideal for exterior projects in colder regions |
Advantages of Painting During Optimal Conditions
- Improved paint adhesion, ensuring that each coat bonds effectively with the surface.
- Faster drying times that reduce delays between applying multiple coats.
- Reduced risk of common issues like bubbling, peeling, or cracking over time.
- Enhanced durability and longevity in both interior and exterior applications.
Tips for Scheduling Your Painting Project
- Opt for spring or early fall when temperatures are moderate.
- Begin work early in the morning or late afternoon to avoid peak sun exposure during summer months.
- Winter can be an excellent option if you’re working indoors with proper ventilation and low moisture levels.
- Use dehumidifiers if you live in a region prone to high indoor humidity during colder months.
- Track local weather patterns using tools like weather apps or websites offering extended forecasts (e.g., up-to-date hourly predictions).
By carefully choosing the season and monitoring environmental conditions closely, you’ll ensure that your project achieves professional-quality outcomes without unnecessary setbacks.
The timing of your painting project is just as important as selecting the right colors or materials. With proper planning based on seasonal advantages and climate factors, achieving optimal results becomes much easier while preserving your investment in both effort and resources over time.
Painting the Interior After Moving In: What You Need to Know to Get Started
Painting the interior of your home after moving in can be an exciting opportunity to personalize your space. However, it’s essential to approach the task methodically to ensure a seamless and stress-free experience. Below are key considerations, tips, and steps to help you get started.
Assess Your Space
Before you begin painting, take time to thoroughly assess your new home: – Wall Conditions: Check for cracks, holes, or water stains that will need repair before painting. – Existing Paint Quality: Determine if the current paint is in good condition or if it requires priming and multiple coats. – Lighting: Observe how natural and artificial light affect wall colors throughout the day.
Taking note of these factors can help guide the preparation process and color selection.
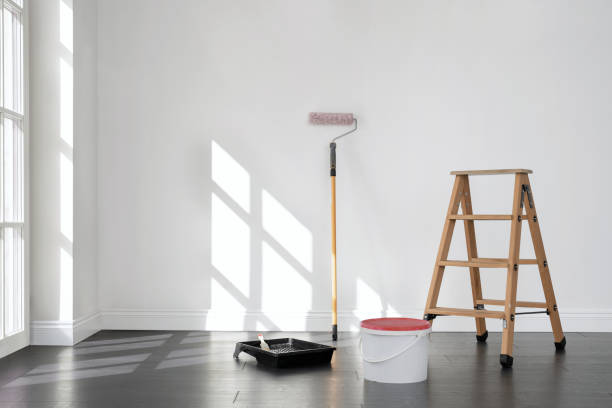
Essential Tools and Supplies
Ensure you have all necessary supplies on hand before starting your project: – Paints & Primers: Select high-quality options suited for specific areas (e.g., matte finishes for ceilings or semi-gloss for bathrooms). – Painting Tools: – Brushes (angled brushes for edges) – Rollers (for large surfaces) – Painter’s tape – Drop cloths – Paint trays
– Additional Supplies: – Sandpaper or spackling paste for wall repairs – A ladder or step stool
Investing in quality tools can significantly impact your final results.
Step-by-Step Preparation
- Remove furniture, decor, and any hanging items from walls.
- Cover floors with drop cloths or plastic sheets to protect against spills.
- Clean walls with mild soap and water to remove dirt or grease.
- Fill small holes or cracks with spackling paste and sand smooth once dry.
- Use painter’s tape along baseboards, door frames, windowsills, and any areas requiring clean edges.
- Prime (if Necessary):
Apply primer if: - The current color is dark or vibrant.
- You’re covering stains or uneven textures. Priming ensures better adhesion of paint and enhances color vibrancy.
Choosing Colors After Moving In
- For calm spaces like bedrooms, opt for soft neutrals, pastels, or muted tones.
- In high-energy areas like kitchens or family rooms, brighter hues such as yellows and greens can create an uplifting atmosphere.
- Incorporate accent walls with bold colors if you’re not ready to commit entirely.
Time-Saving Tips
If you’re eager to complete your painting project efficiently: 1. Use paint-and-primer combinations for rooms requiring minimal prep work. 2. Work during daylight hours for better visibility of imperfections. 3. Paint one room at a time instead of taking on too much at once.
By planning effectively and using proper techniques, painting after moving in becomes an enjoyable way to personalize your new home while ensuring lasting results tailored perfectly to your needs.
Exploring the Benefits of Different Shades: Bright, Dark, and Everything in Between
Selecting the right shades of paint can significantly impact the atmosphere, functionality, and overall aesthetic of your space. Whether you are drawn to bright hues, dark tones, or something in between, understanding the benefits of each shade will help you make informed decisions that align with your vision.
The Appeal of Bright Shades
- Enhanced Light Reflection: Bright colors like white, light yellow, or pastel hues reflect natural and artificial light effectively, making rooms feel larger and airier.
- Mood Boosting: Shades such as soft blues or cheerful yellows can evoke feelings of calmness or happiness.
- Versatile Application: These shades work well in spaces where you want to create a welcoming or lively environment—such as kitchens, living rooms, or children’s rooms.
However, keep in mind that bright colors may require more frequent cleaning as dirt or marks tend to be more noticeable on lighter surfaces.
The Sophistication of Dark Shades
- Cozy Atmosphere: Deep blues, rich greens, or charcoal grays can make a space feel warm and inviting—ideal for bedrooms or study areas.
- Depth and Contrast: Darker walls create dimension by contrasting with lighter furnishings or accents.
- Hides Imperfections: These tones are excellent for masking minor wall imperfections like uneven textures.
One consideration with darker shades is their ability to absorb light. To counteract this effect, use sufficient lighting fixtures or balance them with lighter trims and décor.
The Versatility of Neutral Shades
- Timeless Appeal: Neutrals rarely go out of style and serve as a solid foundation for both modern and traditional designs.
- Flexibility in Décor Choices: These shades complement almost any color scheme for furniture or accessories.
- Ease of Maintenance: Mid-tone neutrals hide dust better than brighter shades while being easier to maintain than dark palettes.
Neutrals work particularly well in common areas such as hallways or open-plan living spaces where cohesion is needed across different zones.
Comparing Shade Characteristics
| Shade Category | Best For | Strengths | Challenges |
| Bright Shades | Kitchens & Living Rooms | Reflect light; boost mood | Require frequent cleaning |
| Dark Shades | Bedrooms & Studies | Create depth; hide imperfections | Absorb light; may feel smaller |
| Neutral Shades | Hallways & Open Spaces | Timeless; versatile | Can feel understated if overused |
Tips for Choosing the Right Shade
- Test small samples on your walls before committing to an entire color.
- Consider lighting conditions throughout the day—natural light can alter how a shade appears.
- Pair bold accent pieces with neutral walls for balanced visuals.
- Use color psychology—bright hues energize while darker shades calm—to match your desired ambiance.
By understanding the unique qualities each shade offers—brightening spaces with light colors, adding sophistication through dark tones, or creating timeless appeal with neutrals—you can select paint that enhances both form and function in your home.
Painters Perrysburg OH: Choosing Between Wallpaper and Paint for Your Walls
When it comes to designing or renovating your home, one of the most significant decisions you’ll make is how to decorate your walls. The two primary options—wallpaper and paint—each offer unique advantages and drawbacks. Deciding which one to use depends on factors like personal style, budget, maintenance needs, and the functionality of the space. Below is a detailed comparison to help you make an informed decision.
1. Durability
- Paint: High-quality paint can last up to 10 years with minimal touch-ups, especially if you choose washable or scrubbable finishes like satin or semi-gloss.
- Wallpaper: Wallpaper tends to have a longer lifespan than paint, often lasting 10–15 years when properly installed. However, it may be more prone to peeling in high-humidity areas unless specially designed for such spaces.
2. Cost
- Paint: Generally more cost-effective upfront compared to wallpaper. Labor costs for painting are also lower since it requires less precision than wallpaper installation.
- Wallpaper: The initial cost of wallpaper (including materials and installation) tends to be higher than paint due to the intricate process of measuring, cutting, and applying.
| Feature | Paint | Wallpaper |
| Initial Cost | Low | High |
| Lifespan | Up to 10 years | Up to 15 years |
| Maintenance | Easy | Moderate |
3. Design Options
- Paint: Offers nearly infinite color choices with flexibility for custom shades and finishes (e.g., matte, eggshell, satin). Accent walls and textured finishes are also options with paint.
- Wallpaper: Provides more intricate patterns and textures that paint cannot achieve. Some wallpapers feature metallic accents or embossed designs that add depth and character.
4. Ease of Application
- Simple application process with brushes or rollers.
- Easier for DIY projects; beginners can handle painting with minimal practice.
- Requires precise measurements and careful application using adhesive.
- Removing old wallpaper can be labor-intensive compared to repainting a surface.
Paint
Pros: – Budget-friendly – Easy touch-ups – Wide variety of colors – Suitable for high-moisture areas (bathrooms/kitchens)
Cons: – May require multiple coats – Limited in providing texture or patterns
Wallpaper
Pros: – Long-lasting durability – Unique patterns/textures that stand out – Better at hiding wall imperfections
Cons: – More expensive upfront – Difficult removal process if you want a change later
Best Choice by Room Type
- Living Rooms/Bedrooms: Both options work well depending on your aesthetic preferences.
- Bathrooms/Kitchens: Paint is typically better due to its moisture resistance unless using waterproof wallpaper.
- Children’s Rooms: Opt for paint if frequent updating is expected as kids’ tastes change.
Final Thoughts
Both wallpaper and paint can transform your walls into beautiful focal points or subtle backdrops depending on your vision for the space. While paint is versatile and budget-friendly, wallpaper offers creative possibilities unmatched by any brushstroke. Carefully evaluate your style preferences, budget constraints, maintenance capabilities, and room requirements before making your choice.
- Finding the Best Painters Perrysburg OH for Interior and Exterior Painting Projects
- Everything New Homeowners Need to Know About Hiring a Painting Company Perrysburg OH
- House Painting Perrysburg OH: Techniques and Tools for Successful Home Projects
- How Often Should You Repaint Interior and Exterior Walls for a Fresh Look in House Painting Perrysburg OH
- 10 Important Factors Painters Perrysburg OH Recommend When Buying House Paint for Your Next Project
- Tips for House Painting Perrysburg OH: Proper Preparation and Maintenance