Painting your home can be a rewarding project that adds charm and value to your living space. To achieve professional-looking results, it’s essential to use the right techniques and tools. This guide provides key insights into the techniques and equipment needed for a successful painting project.
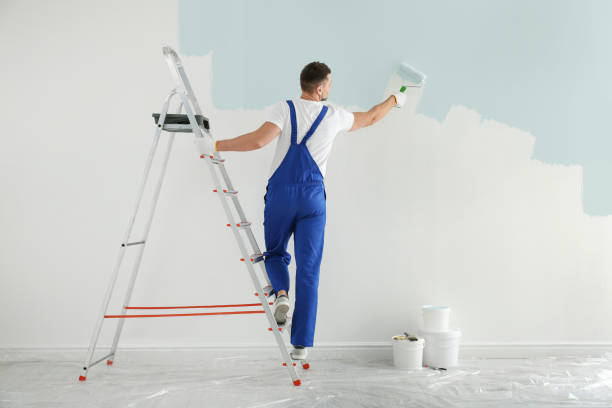
Essential Painting Tools You’ll Need
The right tools are a vital part of any successful painting job. Here’s a breakdown of tools you should have before you begin:
– Paintbrushes: Opt for high-quality brushes of different sizes (angled brushes are great for corners and edges).
– Rollers and Roller Covers: Choose rollers with nap lengths suited to the surface (e.g., short nap for smooth surfaces, long nap for textured walls).
– Paint Trays: Look for sturdy trays with disposable liners to make cleanup easier.
– Painter’s Tape: Ensures clean edges by preventing paint bleed on trim or adjacent walls.
– Drop Cloths or Plastic Sheeting: Protects floors, furniture, and fixtures from paint drips and splatters.
– Extension Poles: Helps reach high ceilings or tall walls without needing ladders.
Additional items such as buckets, stir sticks, sponges, sandpaper, and a step ladder can also come in handy depending on the scope of your project.
| Tool | Purpose | Example Use Case |
| Paintbrush | Precision work | Cutting in along edges or corners |
| Roller | Quick coverage | Painting large wall areas |
| Painter’s tape | Clean lines | Protecting baseboards during wall painting |
| Drop cloth | Surface protection | Covering floors while painting ceilings |
Techniques for Smooth Results
- Start with Clean Surfaces
Dirt, grease, or dust buildup can interfere with paint adhesion. Always clean your walls before starting—use a mild detergent solution followed by rinsing with clean water. - Cut In First
Before using rollers on large surfaces, “cut in” around the edges using a brush. This step creates clean borders near trim pieces or ceilings without accidental roller smudges. - Follow the “W” Technique
When working with rollers on large flat areas: - Start by creating a “W” shape on the surface.
- Fill in the gaps using horizontal strokes.
- This method prevents visible streaks by ensuring even distribution.
- Apply Thin Coats of Paint
Thick layers may create sagging or an uneven texture once dried: - Apply multiple thin coats instead.
- Allow adequate drying time between applications based on manufacturer recommendations.
- Consider Primer Usage
For dramatic color changes or working over stained surfaces: - Use primer as an undercoat.
- It improves adhesion while enhancing final color vibrancy.
Cleaning Up After Paintwork
Once you’ve completed your project: – Remove painter’s tape carefully before paint fully dries to avoid peeling along edges. – Wash brushes and rollers immediately after use; latex paints can be cleaned with soap and water while oil-based paints require specialized solvents like mineral spirits. – Properly dispose of unused paint or store it in airtight containers labeled clearly for future touch-ups.
By mastering these techniques and using reliable tools during your home painting projects, you’ll create polished results that reflect both effort and attention to detail—ensuring long-term satisfaction with your transformed space.
Essential Tools Painters Perrysburg OH Recommend for Painting Your Home Effectively
When tackling a painting project, having the right tools can make all the difference. Whether you are a seasoned professional or a novice DIY enthusiast, investing in proper equipment will not only ensure quality results but also save you time and effort. Below is a comprehensive guide to the essential tools required for successful home painting.
Essential Tools for Any Painting Company Perrysburg OH
- Paintbrushes and Rollers
– Paintbrushes: Ideal for detailed work, such as corners, edges, trims, and smaller surfaces. Choose from synthetic or natural bristles depending on the paint type (latex or oil-based).
– Rollers: Best for covering large, flat surfaces like walls and ceilings. Select rollers with varying nap lengths based on surface texture:
– Short nap (¼” – ⅜”) for smooth surfaces like drywall
– Medium nap (½”) for slightly textured walls
– Long nap (¾” or higher) for rough surfaces like stucco - Painter’s Tape
– Use painter’s tape to create clean lines around trims, baseboards, windows, and other areas where precision is key. Opt for high-quality tape that can be easily removed without damaging surfaces. - Drop Cloths and Plastic Sheeting
– Protect floors, furniture, and fixtures with heavy-duty canvas drop cloths or plastic sheets. Canvas is reusable and more durable than plastic while minimizing paint drips from spreading. - Paint Trays and Liners
– A sturdy paint tray allows you to load your roller effectively without over-saturating it. Liners make cleanup easy by reducing direct contact with paint inside the tray. - Extension Poles
– Attach an extension pole to your roller handle when painting high walls or ceilings without needing a ladder constantly. - Sandpaper/Sanding Block: Smoothens rough patches on walls or previously painted surfaces. – Fine-grit sandpaper (120–220 grit) works well for smoothing imperfections. – Coarser grit can help remove old paint layers if necessary.
- Putty Knife & Spackle: Use these to fill in cracks, holes, dents, or any other surface damage before painting.
- Cleaning Supplies: A clean surface is critical to good paint adhesion: – Use mild detergents or trisodium phosphate (TSP) to remove grime. – Wipe down walls with water afterward to eliminate residue.
Specialty Equipment
| Tool | Purpose |
| Paint Sprayer | Efficiently covers large areas quickly; ideal for fences or exteriors |
| Edging Tool | Helps cut sharp lines around ceiling edges without using painter’s tape |
| Ladder/Step Stool | For reaching higher areas safely |
Tips on Choosing High-Quality Tools
- Invest in Durability: Cheap brushes tend to shed bristles into your paint job; select quality options that will last through multiple projects.
- Match Tools with Paint Type: Certain rollers and brushes are designed specifically for oil-based versus water-based paints.
- Don’t Skip Cleanup Supplies: Keep items such as rags, cleaning solvent (for oil-based paints), and buckets handy post-project.
Having these essential tools ready ensures that you approach any home painting task efficiently while achieving professional results every time!
Essential Tools You Need to Paint Your Home Effectively
When planning a painting project for your home, having the right tools is just as crucial as selecting the perfect color. Equipping yourself with high-quality, purpose-driven tools can ensure a smooth and professional-looking finish, whether you’re painting interior walls or tackling an exterior makeover. Below is a detailed guide on the essential tools you need for effective home painting and how to use them properly.
1. Basic Painting Tools
Here are the fundamental tools that every painter—professional or DIY—should have:
– Paintbrushes: Invest in a variety of brushes for specific jobs: – Angled brushes for precision work along edges and corners. – Flat brushes for larger, flat surfaces. – Rollers and Roller Covers: Ideal for quickly covering large areas with uniform coatings. Use rollers with different nap lengths depending on your surface texture: – Short naps (¼”–½”) for smooth surfaces like drywall. – Medium naps (¾”) for lightly textured walls. – Long naps (1″ or more) for rough surfaces like stucco or brick.
2. Surface Preparation Tools
Proper surface preparation is key to achieving long-lasting results. Include these tools in your kit:
– Sandpaper/Sanding Blocks: Smooth rough patches and remove old paint flakes using sandpaper in various grits (e.g., coarse for stripping paint, fine-grit for smoothing).
– Putty Knife: For applying spackling paste to fill holes, cracks, and imperfections on walls before painting.
– Painter’s Tape: Essential for masking off trim, ceilings, or other areas you don’t want painted. This ensures clean lines at edges when you remove it after painting.
– Drop Cloths or Plastic Sheeting: Protect floors, furniture, and nearby surfaces from accidental drips or spills.
3. Paint Application Accessories
To make your painting process efficient and mess-free, include the following accessories:
– Paint Trays/Paint Grids: Paint trays are used to evenly load rollers with paint; grids are ideal if you’re using a larger bucket of paint instead of trays.
– Extension Poles: Attach these to your roller handles to easily reach high ceilings or tall walls without needing scaffolding or ladders. – Spray Painter (Optional): For large-scale projects like fences or exteriors requiring uniform application over extensive areas.
4. Cleaning Supplies
Cleaning up after a project is vital both for maintaining your tools and keeping the workspace tidy: – Use water-based cleaners (for latex paints) or mineral spirits (for oil-based paints). – Rags, paper towels, and buckets should be on hand to wipe up spills immediately. – A brush comb can help clean bristles thoroughly after use.
| Tool | Purpose | Recommended Use |
| Paintbrushes | Precision work & detailed edges | Corners & trim |
| Rollers | Covering large spaces | Walls & ceilings |
| Painter’s tape | Masking areas | Edges & transitions |
| Drop cloths | Protecting nearby surfaces | Floors & furniture |
Tips When Choosing Tools
- Prioritize quality over cost since higher-quality brushes and rollers leave fewer streaks and last longer.
- Match roller covers’ material to the type of paint being used—synthetic ones pair well with latex paints while natural fibers suit oil-based paints better.
- Test painter’s tape adhesion on small sections before applying it widely, ensuring easy removal without damaging underlying surfaces.
By assembling this toolkit before starting your project, you can reduce challenges during application while achieving professional-grade results at home efficiently.
Top Painting Techniques to Transform Your Home Interior and Exterior
When it comes to giving your home a fresh new look, painting is one of the most effective ways to transform both interior and exterior spaces. Choosing the right techniques can make a significant difference in achieving a professional-quality finish. Below are some top painting techniques that can elevate your space, whether you’re refreshing a single room or tackling an entire house.
Color Blocking for Visual Impact
Color blocking is a popular interior painting technique that involves using two or more contrasting colors within the same space. This technique works well for accent walls, creating focal points, or adding depth to an otherwise simple room.
- Choose complementary or contrasting colors that suit your style.
- Use painter’s tape to create clean lines and define sections of the wall.
- Paint each section carefully, allowing adequate drying time between coats.
- Best uses: Living rooms, bedrooms, and office spaces where you want to add drama or visual interest.
Ombre Walls for Subtle Sophistication
Ombre walls create a gradient effect by blending two or more shades of paint seamlessly from light to dark. This technique adds sophistication and creates a calming ambiance in your home.
- Start with two shades of paint: one lighter and one darker version of the same color family.
- Apply the lighter shade at the top of the wall.
- Blend into the darker shade towards the bottom using a damp sponge or clean brush.
- Work quickly before the paint dries for smooth gradients.
- Best uses: Bedrooms, powder rooms, or nurseries where soft transitions are ideal.
Accent Wall Techniques
An accent wall can dramatically enhance interiors without requiring you to paint an entire room. Bold colors, geometric patterns, stripes, or textured effects can add character effortlessly.
- Use bold hues like navy blue, emerald green, or rich burgundy for sophistication.
- Geometric designs created with painter’s tape (e.g., triangles or diamonds).
- Textured finishes such as sponging, rag rolling, or stenciling for added dimension.
- Best uses: Dining rooms and living rooms as statement pieces.
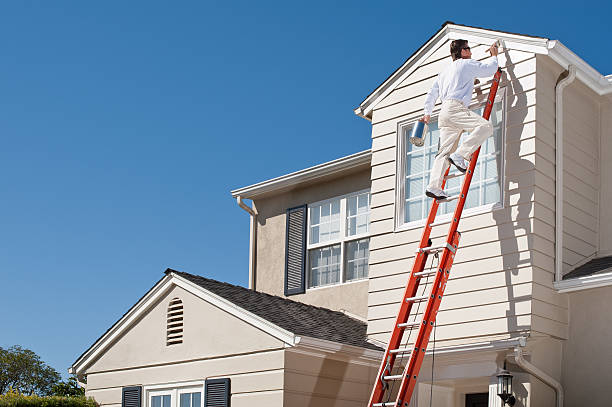
Exterior Painting: Focus on Durability and Uniformity
- Pressure wash surfaces: Clean off dirt and debris before applying paint.
- Use weather-resistant paints: Choose paints labeled as UV-resistant and waterproof.
- Work systematically: Always begin at the top of exterior walls so drips don’t interfere with completed sections below.
- Finish with protective sealants when necessary for added durability against environmental elements.
Tips for Smooth Finishes
- Always use high-quality brushes and rollers appropriate for your surface type (e.g., foam rollers for smooth finishes).
- Maintain proper ventilation indoors when working with oil-based paints.
- Avoid overloading brushes—apply thin layers instead of thick ones for consistent results.
- Sand between coats when necessary for even coverage.
| Surface Type | Recommended Tool | Best Paint Finish |
| Smooth Interior Walls | Foam Roller | Matte / Satin |
| Textured Walls | Long-Nap Roller | Eggshell / Semi-gloss |
| Wood Exteriors | Natural-Bristle Brush | Semi-gloss / Gloss |
By mastering these techniques—from subtle ombre gradients to bold accent features—you can easily transform any space into one that reflects your personal style while maintaining functionality in both form and finish.
Understanding the Key Differences Between Exterior and Interior Painting
When embarking on a painting project, it’s essential to recognize the differences between exterior and interior painting. Each requires distinct approaches, tools, and materials to ensure durability, aesthetics, and effective results. Below, we explore the key aspects that set these two types of painting apart.
1. Paint Formulation
The type of paint used for interior and exterior surfaces differs significantly due to environmental factors and functional needs.
- Designed for durability in controlled environments.
- Focuses on aesthetics with a smooth finish.
- Low odor options are available for enclosed spaces.
- Typically contains fewer VOCs (volatile organic compounds) for healthier indoor air quality.
- Formulated to resist harsh weather conditions such as rain, UV rays, and temperature fluctuations.
- Contains additives like fungicides and UV blockers.
- More resilient against chipping, peeling, or fading over time.
| Feature | Interior Paint | Exterior Paint |
| Durability | Moderate (against wear) | High (for weather resistance) |
| VOC Content | Lower | Higher |
| Additives | Minimal | Fungicides, UV blockers |
| Finish | Smooth | Often textured for better adhesion |
2. Surface Preparation
Preparation is crucial in both cases but varies based on environmental exposure.
- Surfaces must be clean of dust, grease, or stains before application.
- Minor imperfections like nail holes can be filled with spackling compound.
- Walls are typically primed to ensure even color absorption.
- Extra care is needed to remove dirt, mildew, or old flaking paint using pressure washing or scraping tools.
- Cracks in wood or stucco must be sealed with appropriate fillers.
- A specialized primer may be required that bonds well to outdoor materials like brick or siding.
3. Environmental Considerations
The environment plays a major role in determining the approach to painting.
- Interior Painting:
Controlled environments allow for flexibility in timing since weather isn’t a factor. Proper ventilation is key during application to minimize exposure to fumes. - Exterior Painting:
Outdoor conditions like humidity levels and temperatures must align with manufacturer recommendations for optimal results. Work schedules often depend on weather forecasts as rain can wash away fresh paint while strong sunlight may cause rapid drying leading to uneven finishes.
4. Tools and Equipment
While some tools overlap between interior and exterior projects, others are specific due to surface types or height requirements.
- Common Tools:
Brushes (of varying sizes), rollers, painter’s tape Drop cloths for protecting surfaces - Exterior-Specific Tools:
Extension ladders/scaffolding
Pressure washers
Exterior caulk guns
| Tool | Interior Projects | Exterior Projects |
| Drop Cloths | Yes | Yes |
| Extension Ladders | Rarely | Frequently |
| Pressure Washer | No | Yes |
Understanding these distinctions ensures you use the right techniques and materials for your project type. Whether working inside your home or tackling an exterior surface exposed to the elements daily, tailoring your approach will lead to long-lasting outcomes that enhance both appearance and functionality.
Is DIY Painting the Right Choice for Your Next Project?
Painting your home can be a transformative process, but deciding whether to take the DIY route or hire professionals requires careful consideration. While painting on your own can be rewarding and cost-effective, it comes with its own challenges. To help you decide if DIY painting is the right choice for your next project, let’s explore the key factors to weigh.
Benefits of DIY Painting
- Cost Savings: By eliminating labor costs, you can save a significant amount of money. The primary expenses will be paint, tools, and supplies.
- Creative Control: As a DIY painter, you have complete control over every aspect of the project—from colors and finishes to techniques.
- Flexible Timeline: You can work at your own pace without adhering to a professional contractor’s schedule.
- Sense of Accomplishment: Completing a major home improvement task with your own hands can be highly satisfying and rewarding.
Challenges of DIY Painting
- Skill Level Required: Achieving professional-looking results may require experience or practice. Preparing surfaces properly and using advanced techniques might be outside your expertise.
- Time Commitment: Painting can be time-intensive, especially if you’re working on larger spaces or intricate areas like trim or ceilings.
- Equipment Costs: If you don’t already have tools like rollers, brushes, ladders, or drop cloths, purchasing these items could offset some of your savings.
- Potential Mistakes: Inexperience can lead to common issues such as uneven coverage, paint drips, or improper finish application.
Factors to Consider Before Choosing DIY
- Is it just one room, or are you repainting an entire house? Larger projects may be overwhelming for first-time painters.
- Are the walls in good condition? Prepping damaged surfaces (e.g., cracks or peeling paint) can add complexity to the task.
- Do you have sufficient time during evenings or weekends? Rushing through painting often leads to subpar results.
- Compare the total cost of materials for DIY against hiring professionals—especially for complex finishes like textured walls.
When Hiring Professionals Makes Sense
| Scenario | Why Hire Professionals |
| High Ceilings | Specialized equipment is necessary for safety and precision. |
| Historic Homes | Delicate materials require expert care during preparation. |
| Limited Time | Professionals often complete projects faster than amateurs. |
| Complex Techniques | Faux finishes or multicolor designs demand advanced skills. |
Tips for Successful DIY Painting
- Use high-quality paints that provide better coverage and durability.
- Invest in proper tools such as angled brushes for trim work and extendable rollers for ceilings.
- Prepare surfaces thoroughly by cleaning them and filling any holes or cracks.
- Test colors with small swatches before committing fully.
- Work in manageable sections to maintain focus and achieve consistent results.
By understanding your needs and limitations upfront—and planning accordingly—you’ll enhance both the efficiency and outcome of your next painting project.
- Finding the Best Painters Perrysburg OH for Interior and Exterior Painting Projects
- Everything New Homeowners Need to Know About Hiring a Painting Company Perrysburg OH
- House Painting Perrysburg OH: Techniques and Tools for Successful Home Projects
- How Often Should You Repaint Interior and Exterior Walls for a Fresh Look in House Painting Perrysburg OH
- 10 Important Factors Painters Perrysburg OH Recommend When Buying House Paint for Your Next Project
- Tips for House Painting Perrysburg OH: Proper Preparation and Maintenance