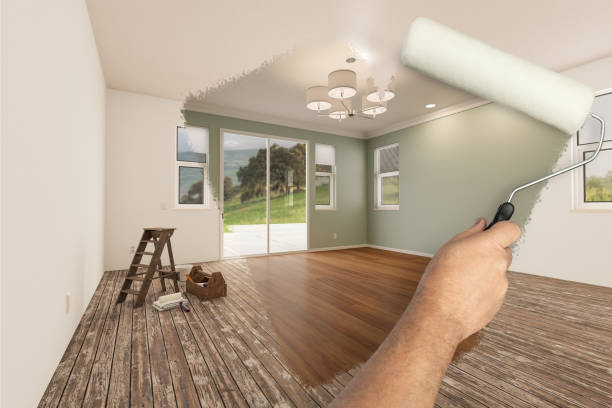
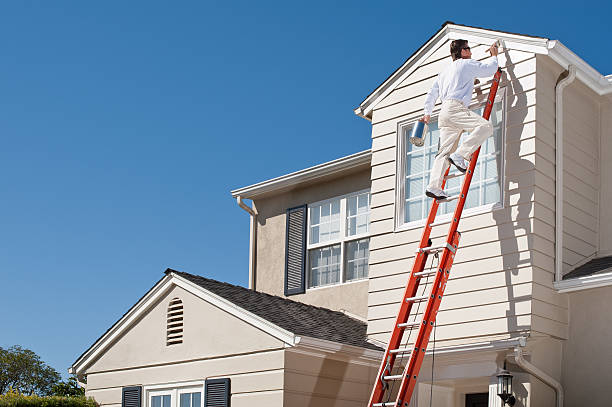
Finding the Best Painters Perrysburg OH for Interior and Exterior Painting Projects

Painting projects can significantly transform the aesthetics and functionality of a space. However, interior and exterior painting projects differ in several key areas, such as paint composition, technique, durability requirements, and environmental considerations. Understanding these differences is essential to select the right materials and achieve optimal results.
Paint Composition: Formulated for Specific Conditions
One of the primary differences between interior and exterior painting projects lies in the paint formulation itself.
- Formulated to withstand cleaning, scuffs, and stains.
- Typically low-VOC (volatile organic compounds) or no-VOC to maintain indoor air quality.
- Emphasis on smooth finishes and a wide variety of colors.
- Less resistant to harsh weather conditions.
- Engineered for exposure to moisture, extreme temperatures, UV radiation, and pollutants.
- Contains additives like mildewcides and UV blockers for enhanced durability.
- Higher VOC levels are common due to stronger binders that resist wear over time.
| Feature | Interior Paint | Exterior Paint |
| Durability | Moderate | High (weather-resistant) |
| VOC Levels | Low or None | Moderate to High |
| Additives | Few | Includes mildewcides & UV blockers |
| Finish Options | Matte, Satin, Gloss | Primarily Satin or Semi-Gloss |
Environmental Factors
Exterior painting must account for weather conditions such as rain, wind, temperature fluctuations, sunlight exposure, and humidity. These factors influence both paint choice and application techniques.
For interiors: – Controlled environments mean fewer variables. – Humidity concerns are typically limited to bathrooms or kitchens.
For exteriors: – Timing becomes crucial; choosing dry weather with consistent temperatures ensures proper curing of the paint. – Surfaces must be prepared to handle elements like precipitation or direct sunlight exposure.
Surface Preparation Differences
Interior Surfaces: 1. Clean walls thoroughly to remove dust particles or grease stains. 2. Repair cracks or nail holes using spackling paste. 3. Sand down uneven areas for a smooth finish before priming.
Exterior Surfaces: 1. Pressure wash surfaces to remove dirt buildup or peeling paint layers. 2. Scrape off old paint manually if necessary (especially flaky sections). 3. Fill gaps with exterior-grade caulk that can withstand outdoor stressors.
Tool Selection: Tailored for Each Project
The tools used in each type of project vary based on scale and surfaces being worked on: – Interior Tools: Rollers with shorter naps, small angled brushes for detail work (e. g. , trim), drop cloths for floors.Exterior Tools: Longer-nap rollers for textured siding/bricks; extension poles; sprayers may be necessary for large areas like fences or decks.
Aesthetic vs Functional Goals
Finally, while aesthetics dominate interior painting decisions—color psychology plays a role indoors—exterior painting prioritizes protection above all else while still offering curb appeal enhancements through cohesive color schemes.
Understanding these critical differences ensures successful planning whether refreshing your living space’s interior beauty or safeguarding your home’s exterior against nature’s elements.
Exploring the Unique Aspects of House Painting Perrysburg OH and Their Applications
Painting projects can vary widely depending on their intended purpose, whether for interior or exterior spaces. Choosing the correct type of paint and application methods is crucial for achieving a long-lasting and aesthetically pleasing finish. Below, we explore the unique aspects of interior and exterior painting types, their specific applications, and how to determine the best approach for your project.
Interior Painting Services by the Top Painting Company Perrysburg OH
Interior painting focuses primarily on aesthetics and creating a conducive indoor environment. The paints used for interiors are specially formulated to meet functional and decorative needs: www.perrysburgpainting.net
Key Features of Interior Paints:
- Low VOC Levels: Most interior paints are designed with low levels of volatile organic compounds (VOCs) to ensure safety in enclosed spaces.
- Smooth Finish: These paints often provide a refined texture, ideal for walls, ceilings, and trim work.
- Durability Against Cleaning: High-quality interior paints are washable, making them resistant to stains or smudges from daily activity.
- Matte vs. Gloss Options: Interior paint finishes range from flat/matte finishes to semi-gloss or high gloss for accentuating details.
Common Applications:
- Living rooms – often benefit from warm tones with matte or eggshell finishes.
- Kitchens – require washable surfaces; semi-gloss or satin finishes work well here.
- Bathrooms – moisture-resistant formulations like mildew-resistant paints ensure longevity.
Interior & Exterior Painting Perrysburg OH: Built to Withstand Harsh Conditions
Exterior paint must endure changing weather conditions while providing an attractive appearance. Its durability is critical since outdoor surfaces face constant exposure to sunlight, rain, wind, dirt, and other environmental factors.
Key Features of Exterior Paints:
- Weather Resistance: Formulated with binders that resist cracking, peeling, or fading under extreme conditions.
- UV Protection: UV-blocking agents prevent sun damage that could lead to discoloration over time.
- Mildew Resistance: Exterior formulations often include additives designed to combat mold or mildew growth in humid climates.
- Thicker Coverage: Typically more viscous than interior paint for better adherence to rougher surfaces like wood or masonry.
Common Applications:
- House siding – requires fade-resistant colors that maintain vibrancy over years of exposure.
- Outdoor furniture – durable paints protect metal or wooden furniture from rusting or rotting due to weather elements.
- Doors and trims – optimal protection against wear-and-tear caused by frequent use.
Differences in Application Techniques
| Aspect | Interior Painting | Exterior Painting |
| Surface Preparation | Cleaning walls; patching holes | Power washing; scraping loose paint |
| Tools | Rollers/brushes; sprayers optional | Brushes/rollers; sprayers common |
| Drying Time | Faster due to controlled indoor conditions | Longer due to outdoor moisture/humidity |
Making the Right Choice for Your Space
Understanding these differences allows you to select paint products suitable for your specific project needs while ensuring durability and visual appeal across various spaces. Whether you’re refreshing a bedroom wall with calming hues or revamping your home’s exterior façade with vibrant shades built to last through the seasons—choosing the right techniques ensures professional results tailored uniquely for every space you transform.
Surface Preparation Techniques for Achieving a Professional Paint Finish
Proper surface preparation is the foundation of any professional-quality paint job. Whether you’re painting walls, ceilings, furniture, or outdoor surfaces, investing time and effort into preparing the surface before applying paint ensures durability, even coverage, and a smooth finish. Below are detailed techniques and steps for effective surface preparation.
Assess the Current Condition of the Surface
Before starting any painting project, evaluate the condition of the surface to identify potential issues such as cracks, peeling paint, stains, or mold.
- Peeling Paint: Scrape off loose or flaking paint with a putty knife or scraper.
- Cracks or Holes: Fill gaps with appropriate fillers such as spackling paste (for interior projects) or exterior-grade filler for outdoor surfaces.
- Stains or Dirt: Clean areas thoroughly to ensure paint adheres properly.
Cleaning the Surface
A clean surface is essential for achieving an even application of paint. Dirt, grease, and grime can interfere with adhesion.
| Surface Type | Cleaning Method | Tools Needed |
| Drywall (Interior) | Wipe with a damp cloth; use mild detergent if needed | Sponge, water bucket |
| Wood Surfaces | Sand lightly to remove dirt; use wood cleaner | Sandpaper (120-150 grit), rag |
| Masonry/Concrete | Pressure wash for deep cleaning | Pressure washer |
Sanding
Sanding eliminates rough patches and creates a smooth base that allows primer and paint to adhere better.
- Coarse Grit (60-80): For removing rough textures or thick layers of old paint.
- Medium Grit (120-150): Ideal for smoothing patched areas.
- Fine Grit (180-220): Best for achieving an ultra-smooth finish before painting.
For larger projects like walls or ceilings, consider using an electric sander to save time.
Priming the Surface
Primers play an essential role in sealing porous surfaces and enhancing paint adhesion.
- Oil-Based Primer: Great for high-moisture areas like kitchens and bathrooms.
- Water-Based Primer: Suitable for drywall and general interior applications.
- Tannin Blocking Primer: Ideal for wood surfaces prone to bleeding (e. g. , cedar).
Apply one coat of primer evenly using a quality brush or roller. Allow sufficient drying time as listed on the product label before applying paint.
Masking and Taping
- Baseboards
- Window trims
- Door frames
Additionally, cover floors with drop cloths to safeguard against spills during application.
Inspect Before Starting
Once cleaned, patched, sanded, primed, and taped off appropriately, inspect your work carefully. Look for imperfections such as uneven patches or missed spots that may affect the final result. Address these issues before opening your can of paint.
By meticulously following these preparation techniques tailored to your project’s needs, you set yourself up for success in achieving a flawless finish that stands out both in appearance and durability.
Surface Preparation Techniques for Achieving a Professional Paint Finish
Proper surface preparation is a critical step in achieving a professional-quality paint finish. Neglecting this phase can result in uneven coverage, poor adhesion, and a shorter lifespan for the paint. Below are key surface preparation techniques that help ensure your painting project achieves durable and visually appealing results.
Cleaning the Surface
Before applying any paint, it is important to clean the surface thoroughly. Dirt, grease, and debris can interfere with paint adhesion.
- Walls and Ceilings: Use mild soap and water for general cleaning or a degreaser for areas prone to oily residue, such as kitchen walls.
- Exterior Surfaces: Pressure washing is often ideal for removing dirt and mildew from siding or other outdoor elements.
- Wood Surfaces: Sanding combined with wiping using a damp cloth ensures that dust does not affect the finish.
Repairing Imperfections
Surfaces need to be smooth and free of damage before paint application.
- Filling Holes: Apply spackle or wood filler using a putty knife. Once it dries completely, sand down to align with the surrounding surface.
- Fixing Cracks: Use caulk for narrower cracks or joint compound for larger gaps in drywall.
- Handling Peeling Paint: Scrape away loose paint using a scraper or wire brush to avoid uneven coverage.
Sanding for Smoothness
Sanding creates an even texture that promotes better paint adhesion.
| Sandpaper Grit | Purpose |
| 60–80 | Removing heavy layers of old paint or varnish |
| 100–150 | General smoothing of surfaces before primer application |
| 220+ | Final smooth sanding before applying coats of finish paint |
Always wipe away sanding dust with a tack cloth or vacuum attachment to maintain cleanliness.
Priming the Surface
Primers are essential for preparing surfaces by sealing porous materials and creating an optimal base layer.
- On bare wood, metal, or drywall.
- When transitioning between drastically different colors (e. g. , dark-to-light).
- For repairing stained surfaces where discoloration might bleed through new coats.
Select primers specifically formulated for interior or exterior use as needed. Apply evenly following manufacturer recommendations on drying times.
Masking and Taping
- Use painter’s tape along edges (e. g. , trim, windows) to maintain clean lines.
- Cover floors with drop cloths made from canvas rather than plastic since they stay in place better and prevent slipping.
Secure tape firmly along edges but remove it shortly after painting while the coat is still slightly wet to avoid peeling cured layers later on.
Benefits of Proper Preparation
- Enhances durability by improving how well the paint adheres.
- Reduces uneven textures caused by underlying imperfections.
- Promotes even color consistency across all painted areas.
- Saves time during application by minimizing touch-ups required later on.
By focusing on these foundational steps before opening your first can of paint, you ensure both professional-grade results and long-lasting beauty in your painting project.
Application Methods and Tools for Perfectly Painted Surfaces
Achieving a flawless paint finish is not solely about selecting the right paint; it also involves using the correct application methods and tools. The techniques and tools you choose can significantly impact the final result, whether you’re painting walls, furniture, or outdoor surfaces. Below is an in-depth guide to help you achieve professional-grade results.
Common Application Methods
Different painting projects often call for different application techniques.
- Best for: Trim work, detailed areas, and smaller surfaces.
- Pros: Offers precision and control in confined spaces.
- Cons: Slower process compared to other methods; may leave brush marks if not done properly.
- Best for: Large, flat surfaces like walls and ceilings.
- Pros: Covers large areas quickly and provides an even coat when used correctly.
- Cons: Edges may require additional precision work with a brush to avoid uneven coverage.
- Best for: Large-scale projects or intricate surfaces like furniture with multiple grooves or textures.
- Pros: Provides a smooth, factory-like finish; ideal for hard-to-reach spots.
- Cons: Requires masking off areas to prevent overspray; equipment can be costly.
Essential Painting Tools
| Tool | Best Use Case | Advantages |
| Paintbrush | Trim, edges, detail work | Precision application |
| Paint roller | Walls, ceilings | Quick coverage of large areas |
| Paint sprayer | Furniture, outdoor projects | Smooth finish on intricate surfaces |
| Painter’s tape | Edges and corners | Prevents unwanted drips or smudges |
| Drop cloths | Floors, furniture protection | Keeps surrounding areas clean |
Tips for Effective Application
- Use High-Quality Tools:Investing in high-quality brushes or rollers ensures better coverage and minimizes streaking.
- Work in Sections:For large areas such as walls or ceilings, divide your workspace into smaller sections to maintain consistent coverage.
- Maintain Proper Technique: When using a brush or roller:
- Use long strokes to avoid uneven patches.
- Avoid overloading the tool with paint to prevent dripping.
- Feather out edges to eliminate harsh lines between sections.
- Dilute Paint When Spraying:If using a sprayer, ensure that the paint is appropriately thinned as per manufacturer instructions for better flow through the nozzle.
Common Mistakes to Avoid
- Skipping Surface Preparation — Inadequate prep causes poor adhesion and an uneven finish (e. g. , not sanding rough spots).
- Overlapping Dry Sections — Always maintain a “wet edge” while painting large surfaces to avoid mismatched textures.
- Ignoring Ventilation — Poor ventilation can lead to strong fumes accumulating indoors during application.
By mastering these tools and techniques while adhering to proper practices, you can transform any surface into a beautifully painted masterpiece that stands out for its professional quality finish.
Color Choices and Trends to Inspire Your Next Painting Project
Color selection plays a pivotal role in painting projects, as it sets the tone and mood of a space. Whether you’re refreshing your home’s interior or revamping an outdoor area, understanding current color trends and making informed choices can enhance the visual appeal and functionality of your project.
Popular Color Trends for Interiors
Interior color choices are often influenced by broader design trends, lifestyle preferences, and psychological effects.
- Earthy Neutrals: Shades such as beige, taupe, and warm grays create a calming, grounded atmosphere while complementing a variety of furniture styles.
- Muted Greens: Soft greens like sage or olive bring a natural feel indoors, symbolizing growth and balance.
- Soft Pinks and Terracottas: Warm hues like blush pink or terracotta add coziness to spaces without being overwhelming.
- Deep Jewel Tones: Colors like emerald green, sapphire blue, or deep burgundy make bold statements in living rooms or accent walls.
- Monochromatic Palettes: Layering different tones of the same color offers depth while maintaining simplicity.
Exterior Color Trends to Elevate Curb Appeal
When selecting exterior colors, it’s essential to consider durability alongside aesthetics.
- Pairing dark siding with light trim (e. g. , charcoal gray siding with white trim) creates a striking yet timeless appearance.
- Light siding with black window frames is another contemporary favorite.
- Earth-inspired shades like clay browns or stone grays blend harmoniously with landscapes.
- Soft greens for shutters or doors evoke freshness when set against neutral facades.
- Two-Tone Exteriors: Using two complementary colors for siding adds dimension. A common approach is combining horizontal planks in one shade with vertical cladding in another.
| Interior Trend | Key Features | Ideal Spaces |
| Earthy Neutrals | Timeless versatility | Living rooms, bedrooms |
| Muted Greens | Connection to nature | Kitchens, bathrooms |
| Deep Jewel Tones | Bold statement | Accent walls |
Tips for Choosing the Right Color Scheme
- Understand Lighting Impact:Natural and artificial lighting can significantly alter how paint appears in different spaces. Test samples during various times of the day before finalizing your choice.
- Consider Room Size:Darker colors often make rooms feel smaller but cozier. Lighter shades open up compact spaces by reflecting more light.
- Factor in Mood: For example:
- Blues promote relaxation—ideal for bedrooms or bathrooms.
- Yellows evoke energy—perfect for kitchens or play areas.
- Test Complementary Colors:Use tools like color wheels or digital apps to explore complementary palettes that enhance harmony across connected spaces.
Innovative Uses of Color
- Add stripes or geometric patterns on feature walls for modern aesthetics.
- Paint ceilings in soft pastels instead of standard white to add subtle character to any room.
- Use stencils to create intricate designs on accent walls without committing fully to wallpaper.
Choosing the right colors not only enhances your space visually but also influences how you experience it emotionally. By staying informed about trends and experimenting thoughtfully with palettes, you can create environments that align perfectly with your vision.
Weather Considerations When Planning Your Painting Endeavor
When undertaking a painting project, weather plays a critical role in determining the success and longevity of the results. Below are key factors to consider when planning your painting endeavors.
Ideal Weather Conditions for Exterior Painting
Exterior painting is particularly sensitive to environmental factors. Choosing the right day to begin your project can ensure proper adhesion and durability of the paint.
- Temperature: Most exterior paints perform best within a temperature range of 50°F to 85°F (10°C to 29°C). Always check the manufacturer’s recommendations on temperature ranges.
- Humidity Levels: High humidity slows down the drying process, which can lead to dripping or sagging paint. If you live in a humid climate, start painting during late morning or early afternoon when dew has evaporated but moisture buildup is minimal.
- Wind ConditionsLight breezes are fine but avoid windy days for smoother finishes.
| Weather Factor | Recommended Range/Condition | Potential Risks |
| Temperature | 50°F – 85°F (10°C – 29°C) | Cracking (cold), uneven drying (hot) |
| Humidity | Less than 70% | Dripping, delayed drying |
| Wind Speed | Light breezes only | Dust contamination |
Interior Painting and Seasonal Timing
- Ventilation: Proper airflow is essential during indoor projects as it helps dissipate fumes from paints with volatile organic compounds (VOCs). Choose mild weather so windows can remain open for extended periods without discomfort.
- Temperature Control: Indoor spaces should ideally maintain temperatures between 60°F and 80°F (15°C and 27°C) during painting. Centralized cooling or heating systems may need adjustments depending on seasonal outdoor conditions.
- Rainy Seasons: Even though interior spaces are shielded from rain, excessive moisture in the air during rainy periods can affect how quickly paint dries.
The Role of Seasonal Changes
- Spring: A great time for both interior and exterior projects as temperatures are moderate. However, be cautious of rainy spells which may delay exterior work.
- Summer: While summer offers long daylight hours for outdoor projects, extreme heat might speed up drying times unnaturally or make textured surfaces difficult to coat evenly.
- Fall: Another excellent season due to cooler temperatures that allow steady curing times; however, earlier sunsets may limit working hours outside.
- Winter: Suitable primarily for indoor projects since cold conditions make exterior work challenging unless specialized winter-formulated paints are used.
Tips for Navigating Unpredictable Weather
- Monitor detailed weather forecasts leading up to your planned start date.
- Reserve buffer days in case unexpected rain or wind disrupts progress.
- Invest in high-quality paints designed for varying climate conditions if you live in regions with fluctuating weather patterns.
By carefully considering these factors before starting your painting project, you’ll ensure a professional-grade finish that withstands time and environmental stressors alike while minimizing potential setbacks from adverse weather conditions.
- Finding the Best Painters Perrysburg OH for Interior and Exterior Painting Projects
- Everything New Homeowners Need to Know About Hiring a Painting Company Perrysburg OH
- House Painting Perrysburg OH: Techniques and Tools for Successful Home Projects
- How Often Should You Repaint Interior and Exterior Walls for a Fresh Look in House Painting Perrysburg OH
- 10 Important Factors Painters Perrysburg OH Recommend When Buying House Paint for Your Next Project
- Tips for House Painting Perrysburg OH: Proper Preparation and Maintenance
Everything New Homeowners Need to Know About Hiring a Painting Company Perrysburg OH
Painting your home is one of the most transformative and cost-effective ways to breathe new life into your living space. For new homeowners, embarking on this journey can feel overwhelming. However, with some foundational knowledge, you can achieve professional-looking results while adding character and personality to your home.
Assessing the Scope of Your Project
- Which rooms or surfaces require painting? This includes walls, ceilings, trim, doors, and potentially cabinets.
- What condition are the surfaces in? Damaged walls may need repairs such as patching holes or sanding rough areas before painting.
- What’s my timeline? Some projects can be completed in a weekend, while others may take weeks depending on size and complexity.
Essential Supplies for a Successful Paint Job
- Quality paint (interior or exterior as needed)
- Primer (for bare or dark surfaces)
- Paint rollers with covers
- Angled brushes for edges and detailed work
- Painter’s tape for clean edges
- Drop cloths to protect floors and furniture
- Sandpaper or sanding blocks
- Spackle for filling cracks or holes
- Rags or microfiber cloths for cleaning surfaces before painting
- A bucket of mild soapy water for wiping away dust and grease stains
- Safety goggles (especially when sanding)
- A mask/respirator if working in poorly ventilated spaces or using strong-smelling paints
Prepping Your Space Before Painting
- Clean Surfaces: Dirt, grease, and dust can interfere with paint adhesion. Use a damp cloth or cleaning solution appropriate for the surface type.
- Patch and Sand Imperfections: Small cracks or nail holes should be filled with spackle and sanded smooth once dry.
- Protect Surrounding Areas: Use painter’s tape along moldings, trim, windowsills, and other areas where you want clean lines.
- Prime When Necessary: Certain situations require primer—especially when covering dark colors with lighter shades or painting over textured walls.
Choosing the Right Paint Type
| Paint Type | Best For | Finish Options |
| Latex (Water-Based) | Interiors; easy cleanup | Matte, satin, semi-gloss |
| Oil-Based | Trim; durability in high-use areas | Glossy finishes |
| Enamel | Cabinets; resistant to wear | High-gloss |
Each type has its advantages depending on usage needs and area-specific requirements.
Setting Realistic Expectations
Painting requires time and patience—rushing through preparation or application processes often leads to unsatisfactory results.
- Allow sufficient drying time between coats (check manufacturer recommendations).
- Plan breaks based on project complexity; tackling one room at a time reduces stress.
- Test small color samples before committing—they may appear different under various lighting conditions.
By following these steps methodically during your first home-painting project as a homeowner ensures both aesthetically pleasing results while protecting long-term investments like walls flooring etc
Choosing the Perfect Interior & Exterior Painting Perrysburg OH to Match Your Vision and Style
Selecting the right paint colors for your home can be a transformative experience, shaping not only the aesthetics but also the mood of your living space. A well-chosen palette brings harmony, reflects your personality, and creates an environment where you feel comfortable. Here’s a guide to help you make informed choices that align with your vision and style.
Understand the Basics of Color Theory
- Primary colors: Red, blue, and yellow are foundational hues.
- Secondary colors: Mixing primary colors creates green, orange, and purple.
- Tertiary colors: Combining primary and secondary shades results in more nuanced hues (e.g., teal or mustard).
The color wheel is a useful tool for exploring relationships between hues: – Complementary colors: Opposite each other on the wheel (e.g., blue and orange) create high contrast. – Analogous colors: Side-by-side shades (e.g., green, blue-green) deliver a harmonious look. – Monochromatic schemes: Variations of one color create depth without overwhelming the space.
Assess Your Space
Your choice of paint should be influenced by your home’s architecture, layout, lighting, and surrounding décor. Consider these factors:
1. Natural Lighting
– North-facing rooms often receive cooler light. Warm tones like beige or soft yellows can balance this out. – South-facing rooms may benefit from cooler shades like light blues or greens to counteract intense sunlight.
- Light colors can make small spaces feel larger by reflecting light.
- Darker shades add coziness but may make compact areas feel enclosed if overused.
- Pay attention to furniture, flooring, cabinetry, or stonework already present in your home to ensure complementary choices.
Define Your Style
Your personal style is key in narrowing down options: – For a modern minimalist aesthetic, opt for neutral tones such as whites, grays, or taupes with subtle accents. – If you gravitate toward a bold contemporary look, incorporate vibrant hues like emerald green or cobalt blue as statement walls. – Fans of a classic traditional design might prefer timeless shades like navy blue or muted creams.
Tips for Testing Paint Options
Never commit to a color based solely on online images or swatches at hardware stores. Test paints properly using these methods: 1. Purchase sample pots of your favorite selections. 2. Paint small sections on multiple walls within the room to see how lighting affects each hue. 3. Allow painted areas to dry fully before evaluating – wet paint often appears different than its final finish.
| Time of Day | Light Source | Color Appearance Should Be Evaluated |
| Morning | Natural sunlight | Check brightness & clarity |
| Afternoon | Mixture of natural/artificial light | Observe balance |
| Evening | Artificial lighting only | Evaluate warmth/brightness shifts |
Trends vs Timeless Choices
While staying up-to-date with trends can be exciting (e.g., earthy terracotta tones or deep greens), focus on what resonates with your vision rather than fleeting fads. Timeless neutral palettes can serve as excellent backdrops while allowing you flexibility with décor updates.
By combining insights from design principles with personal preferences and practical considerations (such as lighting), you’ll achieve an atmosphere uniquely suited to your home aspirations without compromise.
Bright, Bold, or Neutral: A Comprehensive Guide to Color Choices for Your Home
Selecting the right paint colors for your home is essential in setting the tone and mood of each space. Whether you want to create a calming retreat or make a bold statement, understanding how bright, bold, and neutral colors impact your living environment can help you make informed decisions. Below is an in-depth guide to these color categories and their potential applications.
Bright Colors: Energize and Uplift
Bright colors bring energy and vibrancy into a space. They reflect more light and can make smaller rooms appear larger and more welcoming. However, they need to be used thoughtfully to avoid overwhelming the senses.
Key features of bright colors: – Popular shades: Sunny yellows, sky blues, fresh greens
– Best suited for: Kitchens, children’s playrooms, or areas where you want to boost activity levels
– Pairing tips: Balance bright walls with neutral or muted furniture for contrast
Bright color combinations: | Primary Color | Accent Color Suggestions | Ideal Room Type | |—————|—————————|———————–| | Yellow | White, Gray | Kitchen or Breakfast Area | | Aqua Blue | Beige, Gold | Bathrooms | | Lime Green | Charcoal Gray | Home Office |
Bold Colors: Make a Statement
Bold colors are perfect for creating focal points or adding drama to living spaces. They evoke confidence but require careful application to avoid making rooms feel small or overwhelming.
Key features of bold colors: – Popular shades: Deep reds, royal blues, emerald greens
– Best suited for: Accent walls in living rooms, dining rooms, or bedrooms
– Pairing tips: Use bold hues sparingly and complement them with softer tones
Tips for using bold colors effectively: 1. Paint one accent wall instead of all four walls. 2. Use bold shades in large spaces with ample natural light. 3. Incorporate complementary décor such as rugs or artwork.
Neutral Colors: Timeless Versatility
Neutral paint options offer simplicity and sophistication while serving as the perfect blank canvas for other design elements like furniture and accessories.
Key features of neutral colors: – Popular shades: Whites, beiges, greiges (gray-beige), taupes – Best suited for: Living rooms, bedrooms, hallways—any area where flexibility is key – Pairing tips: Add texture through patterned rugs or wooden furniture
Advantages of neutrals: – They create an illusion of spaciousness. – Ideal if you’re planning frequent décor changes. – Easy resale value since they appeal to a wider audience.
Neutral color undertones chart: | Base Color | Undertone Options | Resulting Effect | |————–|—————————–|———————–| | Gray | Blue | Cool and calming | | Beige | Pink | Warm and inviting | | White | Yellow | Softened brightness |
Finding the Right Balance
Mixing bright, bold, and neutral tones across your home can ensure variety without sacrificing cohesion. For instance: – Pair a neutral base palette with pops of brighter hues through accent pieces like cushions or wall art. – Offset a boldly painted room by keeping adjoining spaces light-colored.
By understanding the emotional impact and practical applications of each type of color choice—bright for energy, bold for drama, neutral for versatility—you’ll be better equipped to create a cohesive home that reflects your personal style while maintaining functionality.
Expert Tips for House Painting Perrysburg OH Without Breaking the Bank or Losing Sleep
Painting your house is an excellent way to breathe new life into your space without embarking on a costly renovation. However, the process can feel overwhelming, especially if you’re trying to stay within a budget and maintain your peace of mind. With careful planning and smart strategies, you can transform your home effectively and affordably. Below are expert tips to help you navigate this project.
Plan Your Budget
- Calculate wall space: Determine how much paint you’ll need by measuring the square footage of walls and ceilings.
- Choose economical brands: Not all high-quality paints are expensive; look for mid-range options that provide durability.
- Factor in supplies: Include brushes, rollers, painter’s tape, drop cloths, and other materials in your budget.
| Item | Estimated Cost |
| Paint (per gallon) | $20-$60 |
| Brushes/Rollers | $5-$15 each |
| Painter’s Tape (roll) | $3-$6 |
| Drop Cloths | $10-$20 |
Prep Like a Pro
Preparation is key to saving both time and money during painting projects. Proper prep work ensures smoother finishes and fewer costly mistakes.
- Clean surfaces thoroughly: Dusty or greasy walls affect paint adhesion.
- Repair imperfections: Patch holes and cracks with spackle or filler before priming.
- Use primer wisely: A primer may seem like an extra expense, but it reduces the number of paint coats needed—saving time and money.
Choose Quality Over Quantity
It might be tempting to opt for cheaper paint; however, lower-quality paints often require more coats to achieve coverage. Investing in quality products can lead to better results while minimizing waste.
Benefits of High-Quality Paint:
- Better coverage: Reduces the number of coats required.
- Durability: Resists wear and tear over time.
- Ease of application: Applies smoothly with fewer streaks.
DIY vs Professional Help
Deciding whether to tackle painting yourself or hire professionals depends on your skill level, available time, and budget.
Pros of DIY:
- Cost savings on labor fees.
- Full control over the timeline.
Cons of DIY:
- Time-intensive if you’re inexperienced.
- Greater risk of errors like uneven coatings or drips.
When Hiring Professionals Makes Sense:
- Large-scale projects like exterior painting.
- Detailed work such as intricate trims or textured walls.
Work Smarter with Time-Saving Techniques
- Paint one room at a time rather than multitasking across several areas.
- Use tools such as extension poles for hard-to-reach ceilings.
- Apply paint in “W” patterns with rollers for even distribution.
By implementing these strategies thoughtfully, you’ll be able to complete your house-painting project efficiently while staying on budget—and sleeping soundly at night knowing you’ve made smart choices throughout the process!
The Best Time of Year to Paint Your Home for Optimal Results
Timing is a critical factor when it comes to painting your home. Certain seasons and environmental conditions can significantly impact the quality, durability, and success of a paint job. Understanding the best time of year to paint your home ensures not only a more efficient process but also long-lasting results. Below is an in-depth guide on when and why timing matters when undertaking this transformative project.
Factors That Influence Painting Conditions
- Ideal temperature ranges for painting typically fall between 50°F and 85°F (10°C–29°C).
- Extreme temperatures, either too hot or too cold, can cause paint to dry unevenly or not adhere properly to surfaces.
- High humidity slows down drying times and may lead to issues like blistering or peeling.
- Aim for a humidity level below 50% whenever possible.
- Rain can wash away freshly applied paint or saturate surfaces, making it harder for new coats to bond effectively.
- Always check the weather forecast before beginning any outdoor painting projects.
- High wind during application can result in overspray, uneven coverage, or even dust settling onto wet surfaces.
Ideal Seasons for Painting
| Season | Pros | Cons |
| Spring | Moderate temperatures and lower humidity levels | Unpredictable rain patterns in some regions |
| Summer | Warm weather accelerates drying times | Heat waves may lead to premature drying or cracking |
| Fall | Cooler weather with stable conditions | Shorter daylight hours reduce working time |
| Winter | Suitable in mild climates with proper indoor heating | Not ideal for exterior projects in colder regions |
Advantages of Painting During Optimal Conditions
- Improved paint adhesion, ensuring that each coat bonds effectively with the surface.
- Faster drying times that reduce delays between applying multiple coats.
- Reduced risk of common issues like bubbling, peeling, or cracking over time.
- Enhanced durability and longevity in both interior and exterior applications.
Tips for Scheduling Your Painting Project
- Opt for spring or early fall when temperatures are moderate.
- Begin work early in the morning or late afternoon to avoid peak sun exposure during summer months.
- Winter can be an excellent option if you’re working indoors with proper ventilation and low moisture levels.
- Use dehumidifiers if you live in a region prone to high indoor humidity during colder months.
- Track local weather patterns using tools like weather apps or websites offering extended forecasts (e.g., up-to-date hourly predictions).
By carefully choosing the season and monitoring environmental conditions closely, you’ll ensure that your project achieves professional-quality outcomes without unnecessary setbacks.
The timing of your painting project is just as important as selecting the right colors or materials. With proper planning based on seasonal advantages and climate factors, achieving optimal results becomes much easier while preserving your investment in both effort and resources over time.
Painting the Interior After Moving In: What You Need to Know to Get Started
Painting the interior of your home after moving in can be an exciting opportunity to personalize your space. However, it’s essential to approach the task methodically to ensure a seamless and stress-free experience. Below are key considerations, tips, and steps to help you get started.
Assess Your Space
Before you begin painting, take time to thoroughly assess your new home: – Wall Conditions: Check for cracks, holes, or water stains that will need repair before painting. – Existing Paint Quality: Determine if the current paint is in good condition or if it requires priming and multiple coats. – Lighting: Observe how natural and artificial light affect wall colors throughout the day.
Taking note of these factors can help guide the preparation process and color selection.
Essential Tools and Supplies
Ensure you have all necessary supplies on hand before starting your project: – Paints & Primers: Select high-quality options suited for specific areas (e.g., matte finishes for ceilings or semi-gloss for bathrooms). – Painting Tools: – Brushes (angled brushes for edges) – Rollers (for large surfaces) – Painter’s tape – Drop cloths – Paint trays
– Additional Supplies: – Sandpaper or spackling paste for wall repairs – A ladder or step stool
Investing in quality tools can significantly impact your final results.
Step-by-Step Preparation
- Remove furniture, decor, and any hanging items from walls.
- Cover floors with drop cloths or plastic sheets to protect against spills.
- Clean walls with mild soap and water to remove dirt or grease.
- Fill small holes or cracks with spackling paste and sand smooth once dry.
- Use painter’s tape along baseboards, door frames, windowsills, and any areas requiring clean edges.
- Prime (if Necessary):
Apply primer if: - The current color is dark or vibrant.
- You’re covering stains or uneven textures. Priming ensures better adhesion of paint and enhances color vibrancy.
Choosing Colors After Moving In
- For calm spaces like bedrooms, opt for soft neutrals, pastels, or muted tones.
- In high-energy areas like kitchens or family rooms, brighter hues such as yellows and greens can create an uplifting atmosphere.
- Incorporate accent walls with bold colors if you’re not ready to commit entirely.
Time-Saving Tips
If you’re eager to complete your painting project efficiently: 1. Use paint-and-primer combinations for rooms requiring minimal prep work. 2. Work during daylight hours for better visibility of imperfections. 3. Paint one room at a time instead of taking on too much at once.
By planning effectively and using proper techniques, painting after moving in becomes an enjoyable way to personalize your new home while ensuring lasting results tailored perfectly to your needs.
Exploring the Benefits of Different Shades: Bright, Dark, and Everything in Between
Selecting the right shades of paint can significantly impact the atmosphere, functionality, and overall aesthetic of your space. Whether you are drawn to bright hues, dark tones, or something in between, understanding the benefits of each shade will help you make informed decisions that align with your vision.
The Appeal of Bright Shades
- Enhanced Light Reflection: Bright colors like white, light yellow, or pastel hues reflect natural and artificial light effectively, making rooms feel larger and airier.
- Mood Boosting: Shades such as soft blues or cheerful yellows can evoke feelings of calmness or happiness.
- Versatile Application: These shades work well in spaces where you want to create a welcoming or lively environment—such as kitchens, living rooms, or children’s rooms.
However, keep in mind that bright colors may require more frequent cleaning as dirt or marks tend to be more noticeable on lighter surfaces.
The Sophistication of Dark Shades
- Cozy Atmosphere: Deep blues, rich greens, or charcoal grays can make a space feel warm and inviting—ideal for bedrooms or study areas.
- Depth and Contrast: Darker walls create dimension by contrasting with lighter furnishings or accents.
- Hides Imperfections: These tones are excellent for masking minor wall imperfections like uneven textures.
One consideration with darker shades is their ability to absorb light. To counteract this effect, use sufficient lighting fixtures or balance them with lighter trims and décor.
The Versatility of Neutral Shades
- Timeless Appeal: Neutrals rarely go out of style and serve as a solid foundation for both modern and traditional designs.
- Flexibility in Décor Choices: These shades complement almost any color scheme for furniture or accessories.
- Ease of Maintenance: Mid-tone neutrals hide dust better than brighter shades while being easier to maintain than dark palettes.
Neutrals work particularly well in common areas such as hallways or open-plan living spaces where cohesion is needed across different zones.
Comparing Shade Characteristics
| Shade Category | Best For | Strengths | Challenges |
| Bright Shades | Kitchens & Living Rooms | Reflect light; boost mood | Require frequent cleaning |
| Dark Shades | Bedrooms & Studies | Create depth; hide imperfections | Absorb light; may feel smaller |
| Neutral Shades | Hallways & Open Spaces | Timeless; versatile | Can feel understated if overused |
Tips for Choosing the Right Shade
- Test small samples on your walls before committing to an entire color.
- Consider lighting conditions throughout the day—natural light can alter how a shade appears.
- Pair bold accent pieces with neutral walls for balanced visuals.
- Use color psychology—bright hues energize while darker shades calm—to match your desired ambiance.
By understanding the unique qualities each shade offers—brightening spaces with light colors, adding sophistication through dark tones, or creating timeless appeal with neutrals—you can select paint that enhances both form and function in your home.
Painters Perrysburg OH: Choosing Between Wallpaper and Paint for Your Walls
When it comes to designing or renovating your home, one of the most significant decisions you’ll make is how to decorate your walls. The two primary options—wallpaper and paint—each offer unique advantages and drawbacks. Deciding which one to use depends on factors like personal style, budget, maintenance needs, and the functionality of the space. Below is a detailed comparison to help you make an informed decision.
1. Durability
- Paint: High-quality paint can last up to 10 years with minimal touch-ups, especially if you choose washable or scrubbable finishes like satin or semi-gloss.
- Wallpaper: Wallpaper tends to have a longer lifespan than paint, often lasting 10–15 years when properly installed. However, it may be more prone to peeling in high-humidity areas unless specially designed for such spaces.
2. Cost
- Paint: Generally more cost-effective upfront compared to wallpaper. Labor costs for painting are also lower since it requires less precision than wallpaper installation.
- Wallpaper: The initial cost of wallpaper (including materials and installation) tends to be higher than paint due to the intricate process of measuring, cutting, and applying.
| Feature | Paint | Wallpaper |
| Initial Cost | Low | High |
| Lifespan | Up to 10 years | Up to 15 years |
| Maintenance | Easy | Moderate |
3. Design Options
- Paint: Offers nearly infinite color choices with flexibility for custom shades and finishes (e.g., matte, eggshell, satin). Accent walls and textured finishes are also options with paint.
- Wallpaper: Provides more intricate patterns and textures that paint cannot achieve. Some wallpapers feature metallic accents or embossed designs that add depth and character.
4. Ease of Application
- Simple application process with brushes or rollers.
- Easier for DIY projects; beginners can handle painting with minimal practice.
- Requires precise measurements and careful application using adhesive.
- Removing old wallpaper can be labor-intensive compared to repainting a surface.
Paint
Pros: – Budget-friendly – Easy touch-ups – Wide variety of colors – Suitable for high-moisture areas (bathrooms/kitchens)
Cons: – May require multiple coats – Limited in providing texture or patterns
Wallpaper
Pros: – Long-lasting durability – Unique patterns/textures that stand out – Better at hiding wall imperfections
Cons: – More expensive upfront – Difficult removal process if you want a change later
Best Choice by Room Type
- Living Rooms/Bedrooms: Both options work well depending on your aesthetic preferences.
- Bathrooms/Kitchens: Paint is typically better due to its moisture resistance unless using waterproof wallpaper.
- Children’s Rooms: Opt for paint if frequent updating is expected as kids’ tastes change.
Final Thoughts
Both wallpaper and paint can transform your walls into beautiful focal points or subtle backdrops depending on your vision for the space. While paint is versatile and budget-friendly, wallpaper offers creative possibilities unmatched by any brushstroke. Carefully evaluate your style preferences, budget constraints, maintenance capabilities, and room requirements before making your choice.
- Finding the Best Painters Perrysburg OH for Interior and Exterior Painting Projects
- Everything New Homeowners Need to Know About Hiring a Painting Company Perrysburg OH
- House Painting Perrysburg OH: Techniques and Tools for Successful Home Projects
- How Often Should You Repaint Interior and Exterior Walls for a Fresh Look in House Painting Perrysburg OH
- 10 Important Factors Painters Perrysburg OH Recommend When Buying House Paint for Your Next Project
- Tips for House Painting Perrysburg OH: Proper Preparation and Maintenance
House Painting Perrysburg OH: Techniques and Tools for Successful Home Projects
Painting your home can be a rewarding project that adds charm and value to your living space. To achieve professional-looking results, it’s essential to use the right techniques and tools. This guide provides key insights into the techniques and equipment needed for a successful painting project.
Essential Painting Tools You’ll Need
The right tools are a vital part of any successful painting job. Here’s a breakdown of tools you should have before you begin:
– Paintbrushes: Opt for high-quality brushes of different sizes (angled brushes are great for corners and edges).
– Rollers and Roller Covers: Choose rollers with nap lengths suited to the surface (e.g., short nap for smooth surfaces, long nap for textured walls).
– Paint Trays: Look for sturdy trays with disposable liners to make cleanup easier.
– Painter’s Tape: Ensures clean edges by preventing paint bleed on trim or adjacent walls.
– Drop Cloths or Plastic Sheeting: Protects floors, furniture, and fixtures from paint drips and splatters.
– Extension Poles: Helps reach high ceilings or tall walls without needing ladders.
Additional items such as buckets, stir sticks, sponges, sandpaper, and a step ladder can also come in handy depending on the scope of your project.
| Tool | Purpose | Example Use Case |
| Paintbrush | Precision work | Cutting in along edges or corners |
| Roller | Quick coverage | Painting large wall areas |
| Painter’s tape | Clean lines | Protecting baseboards during wall painting |
| Drop cloth | Surface protection | Covering floors while painting ceilings |
Techniques for Smooth Results
- Start with Clean Surfaces
Dirt, grease, or dust buildup can interfere with paint adhesion. Always clean your walls before starting—use a mild detergent solution followed by rinsing with clean water. - Cut In First
Before using rollers on large surfaces, “cut in” around the edges using a brush. This step creates clean borders near trim pieces or ceilings without accidental roller smudges. - Follow the “W” Technique
When working with rollers on large flat areas: - Start by creating a “W” shape on the surface.
- Fill in the gaps using horizontal strokes.
- This method prevents visible streaks by ensuring even distribution.
- Apply Thin Coats of Paint
Thick layers may create sagging or an uneven texture once dried: - Apply multiple thin coats instead.
- Allow adequate drying time between applications based on manufacturer recommendations.
- Consider Primer Usage
For dramatic color changes or working over stained surfaces: - Use primer as an undercoat.
- It improves adhesion while enhancing final color vibrancy.
Cleaning Up After Paintwork
Once you’ve completed your project: – Remove painter’s tape carefully before paint fully dries to avoid peeling along edges. – Wash brushes and rollers immediately after use; latex paints can be cleaned with soap and water while oil-based paints require specialized solvents like mineral spirits. – Properly dispose of unused paint or store it in airtight containers labeled clearly for future touch-ups.
By mastering these techniques and using reliable tools during your home painting projects, you’ll create polished results that reflect both effort and attention to detail—ensuring long-term satisfaction with your transformed space.
Essential Tools Painters Perrysburg OH Recommend for Painting Your Home Effectively
When tackling a painting project, having the right tools can make all the difference. Whether you are a seasoned professional or a novice DIY enthusiast, investing in proper equipment will not only ensure quality results but also save you time and effort. Below is a comprehensive guide to the essential tools required for successful home painting.
Essential Tools for Any Painting Company Perrysburg OH
- Paintbrushes and Rollers
– Paintbrushes: Ideal for detailed work, such as corners, edges, trims, and smaller surfaces. Choose from synthetic or natural bristles depending on the paint type (latex or oil-based).
– Rollers: Best for covering large, flat surfaces like walls and ceilings. Select rollers with varying nap lengths based on surface texture:
– Short nap (¼” – ⅜”) for smooth surfaces like drywall
– Medium nap (½”) for slightly textured walls
– Long nap (¾” or higher) for rough surfaces like stucco - Painter’s Tape
– Use painter’s tape to create clean lines around trims, baseboards, windows, and other areas where precision is key. Opt for high-quality tape that can be easily removed without damaging surfaces. - Drop Cloths and Plastic Sheeting
– Protect floors, furniture, and fixtures with heavy-duty canvas drop cloths or plastic sheets. Canvas is reusable and more durable than plastic while minimizing paint drips from spreading. - Paint Trays and Liners
– A sturdy paint tray allows you to load your roller effectively without over-saturating it. Liners make cleanup easy by reducing direct contact with paint inside the tray. - Extension Poles
– Attach an extension pole to your roller handle when painting high walls or ceilings without needing a ladder constantly. - Sandpaper/Sanding Block: Smoothens rough patches on walls or previously painted surfaces. – Fine-grit sandpaper (120–220 grit) works well for smoothing imperfections. – Coarser grit can help remove old paint layers if necessary.
- Putty Knife & Spackle: Use these to fill in cracks, holes, dents, or any other surface damage before painting.
- Cleaning Supplies: A clean surface is critical to good paint adhesion: – Use mild detergents or trisodium phosphate (TSP) to remove grime. – Wipe down walls with water afterward to eliminate residue.
Specialty Equipment
| Tool | Purpose |
| Paint Sprayer | Efficiently covers large areas quickly; ideal for fences or exteriors |
| Edging Tool | Helps cut sharp lines around ceiling edges without using painter’s tape |
| Ladder/Step Stool | For reaching higher areas safely |
Tips on Choosing High-Quality Tools
- Invest in Durability: Cheap brushes tend to shed bristles into your paint job; select quality options that will last through multiple projects.
- Match Tools with Paint Type: Certain rollers and brushes are designed specifically for oil-based versus water-based paints.
- Don’t Skip Cleanup Supplies: Keep items such as rags, cleaning solvent (for oil-based paints), and buckets handy post-project.
Having these essential tools ready ensures that you approach any home painting task efficiently while achieving professional results every time!
Essential Tools You Need to Paint Your Home Effectively
When planning a painting project for your home, having the right tools is just as crucial as selecting the perfect color. Equipping yourself with high-quality, purpose-driven tools can ensure a smooth and professional-looking finish, whether you’re painting interior walls or tackling an exterior makeover. Below is a detailed guide on the essential tools you need for effective home painting and how to use them properly.
1. Basic Painting Tools
Here are the fundamental tools that every painter—professional or DIY—should have:
– Paintbrushes: Invest in a variety of brushes for specific jobs: – Angled brushes for precision work along edges and corners. – Flat brushes for larger, flat surfaces. – Rollers and Roller Covers: Ideal for quickly covering large areas with uniform coatings. Use rollers with different nap lengths depending on your surface texture: – Short naps (¼”–½”) for smooth surfaces like drywall. – Medium naps (¾”) for lightly textured walls. – Long naps (1″ or more) for rough surfaces like stucco or brick.
2. Surface Preparation Tools
Proper surface preparation is key to achieving long-lasting results. Include these tools in your kit:
– Sandpaper/Sanding Blocks: Smooth rough patches and remove old paint flakes using sandpaper in various grits (e.g., coarse for stripping paint, fine-grit for smoothing).
– Putty Knife: For applying spackling paste to fill holes, cracks, and imperfections on walls before painting.
– Painter’s Tape: Essential for masking off trim, ceilings, or other areas you don’t want painted. This ensures clean lines at edges when you remove it after painting.
– Drop Cloths or Plastic Sheeting: Protect floors, furniture, and nearby surfaces from accidental drips or spills.
3. Paint Application Accessories
To make your painting process efficient and mess-free, include the following accessories:
– Paint Trays/Paint Grids: Paint trays are used to evenly load rollers with paint; grids are ideal if you’re using a larger bucket of paint instead of trays.
– Extension Poles: Attach these to your roller handles to easily reach high ceilings or tall walls without needing scaffolding or ladders. – Spray Painter (Optional): For large-scale projects like fences or exteriors requiring uniform application over extensive areas.
4. Cleaning Supplies
Cleaning up after a project is vital both for maintaining your tools and keeping the workspace tidy: – Use water-based cleaners (for latex paints) or mineral spirits (for oil-based paints). – Rags, paper towels, and buckets should be on hand to wipe up spills immediately. – A brush comb can help clean bristles thoroughly after use.
| Tool | Purpose | Recommended Use |
| Paintbrushes | Precision work & detailed edges | Corners & trim |
| Rollers | Covering large spaces | Walls & ceilings |
| Painter’s tape | Masking areas | Edges & transitions |
| Drop cloths | Protecting nearby surfaces | Floors & furniture |
Tips When Choosing Tools
- Prioritize quality over cost since higher-quality brushes and rollers leave fewer streaks and last longer.
- Match roller covers’ material to the type of paint being used—synthetic ones pair well with latex paints while natural fibers suit oil-based paints better.
- Test painter’s tape adhesion on small sections before applying it widely, ensuring easy removal without damaging underlying surfaces.
By assembling this toolkit before starting your project, you can reduce challenges during application while achieving professional-grade results at home efficiently.
Top Painting Techniques to Transform Your Home Interior and Exterior
When it comes to giving your home a fresh new look, painting is one of the most effective ways to transform both interior and exterior spaces. Choosing the right techniques can make a significant difference in achieving a professional-quality finish. Below are some top painting techniques that can elevate your space, whether you’re refreshing a single room or tackling an entire house.
Color Blocking for Visual Impact
Color blocking is a popular interior painting technique that involves using two or more contrasting colors within the same space. This technique works well for accent walls, creating focal points, or adding depth to an otherwise simple room.
- Choose complementary or contrasting colors that suit your style.
- Use painter’s tape to create clean lines and define sections of the wall.
- Paint each section carefully, allowing adequate drying time between coats.
- Best uses: Living rooms, bedrooms, and office spaces where you want to add drama or visual interest.
Ombre Walls for Subtle Sophistication
Ombre walls create a gradient effect by blending two or more shades of paint seamlessly from light to dark. This technique adds sophistication and creates a calming ambiance in your home.
- Start with two shades of paint: one lighter and one darker version of the same color family.
- Apply the lighter shade at the top of the wall.
- Blend into the darker shade towards the bottom using a damp sponge or clean brush.
- Work quickly before the paint dries for smooth gradients.
- Best uses: Bedrooms, powder rooms, or nurseries where soft transitions are ideal.
Accent Wall Techniques
An accent wall can dramatically enhance interiors without requiring you to paint an entire room. Bold colors, geometric patterns, stripes, or textured effects can add character effortlessly.
- Use bold hues like navy blue, emerald green, or rich burgundy for sophistication.
- Geometric designs created with painter’s tape (e.g., triangles or diamonds).
- Textured finishes such as sponging, rag rolling, or stenciling for added dimension.
- Best uses: Dining rooms and living rooms as statement pieces.
Exterior Painting: Focus on Durability and Uniformity
- Pressure wash surfaces: Clean off dirt and debris before applying paint.
- Use weather-resistant paints: Choose paints labeled as UV-resistant and waterproof.
- Work systematically: Always begin at the top of exterior walls so drips don’t interfere with completed sections below.
- Finish with protective sealants when necessary for added durability against environmental elements.
Tips for Smooth Finishes
- Always use high-quality brushes and rollers appropriate for your surface type (e.g., foam rollers for smooth finishes).
- Maintain proper ventilation indoors when working with oil-based paints.
- Avoid overloading brushes—apply thin layers instead of thick ones for consistent results.
- Sand between coats when necessary for even coverage.
| Surface Type | Recommended Tool | Best Paint Finish |
| Smooth Interior Walls | Foam Roller | Matte / Satin |
| Textured Walls | Long-Nap Roller | Eggshell / Semi-gloss |
| Wood Exteriors | Natural-Bristle Brush | Semi-gloss / Gloss |
By mastering these techniques—from subtle ombre gradients to bold accent features—you can easily transform any space into one that reflects your personal style while maintaining functionality in both form and finish.
Understanding the Key Differences Between Exterior and Interior Painting
When embarking on a painting project, it’s essential to recognize the differences between exterior and interior painting. Each requires distinct approaches, tools, and materials to ensure durability, aesthetics, and effective results. Below, we explore the key aspects that set these two types of painting apart.
1. Paint Formulation
The type of paint used for interior and exterior surfaces differs significantly due to environmental factors and functional needs.
- Designed for durability in controlled environments.
- Focuses on aesthetics with a smooth finish.
- Low odor options are available for enclosed spaces.
- Typically contains fewer VOCs (volatile organic compounds) for healthier indoor air quality.
- Formulated to resist harsh weather conditions such as rain, UV rays, and temperature fluctuations.
- Contains additives like fungicides and UV blockers.
- More resilient against chipping, peeling, or fading over time.
| Feature | Interior Paint | Exterior Paint |
| Durability | Moderate (against wear) | High (for weather resistance) |
| VOC Content | Lower | Higher |
| Additives | Minimal | Fungicides, UV blockers |
| Finish | Smooth | Often textured for better adhesion |
2. Surface Preparation
Preparation is crucial in both cases but varies based on environmental exposure.
- Surfaces must be clean of dust, grease, or stains before application.
- Minor imperfections like nail holes can be filled with spackling compound.
- Walls are typically primed to ensure even color absorption.
- Extra care is needed to remove dirt, mildew, or old flaking paint using pressure washing or scraping tools.
- Cracks in wood or stucco must be sealed with appropriate fillers.
- A specialized primer may be required that bonds well to outdoor materials like brick or siding.
3. Environmental Considerations
The environment plays a major role in determining the approach to painting.
- Interior Painting:
Controlled environments allow for flexibility in timing since weather isn’t a factor. Proper ventilation is key during application to minimize exposure to fumes. - Exterior Painting:
Outdoor conditions like humidity levels and temperatures must align with manufacturer recommendations for optimal results. Work schedules often depend on weather forecasts as rain can wash away fresh paint while strong sunlight may cause rapid drying leading to uneven finishes.
4. Tools and Equipment
While some tools overlap between interior and exterior projects, others are specific due to surface types or height requirements.
- Common Tools:
Brushes (of varying sizes), rollers, painter’s tape Drop cloths for protecting surfaces - Exterior-Specific Tools:
Extension ladders/scaffolding
Pressure washers
Exterior caulk guns
| Tool | Interior Projects | Exterior Projects |
| Drop Cloths | Yes | Yes |
| Extension Ladders | Rarely | Frequently |
| Pressure Washer | No | Yes |
Understanding these distinctions ensures you use the right techniques and materials for your project type. Whether working inside your home or tackling an exterior surface exposed to the elements daily, tailoring your approach will lead to long-lasting outcomes that enhance both appearance and functionality.
Is DIY Painting the Right Choice for Your Next Project?
Painting your home can be a transformative process, but deciding whether to take the DIY route or hire professionals requires careful consideration. While painting on your own can be rewarding and cost-effective, it comes with its own challenges. To help you decide if DIY painting is the right choice for your next project, let’s explore the key factors to weigh.
Benefits of DIY Painting
- Cost Savings: By eliminating labor costs, you can save a significant amount of money. The primary expenses will be paint, tools, and supplies.
- Creative Control: As a DIY painter, you have complete control over every aspect of the project—from colors and finishes to techniques.
- Flexible Timeline: You can work at your own pace without adhering to a professional contractor’s schedule.
- Sense of Accomplishment: Completing a major home improvement task with your own hands can be highly satisfying and rewarding.
Challenges of DIY Painting
- Skill Level Required: Achieving professional-looking results may require experience or practice. Preparing surfaces properly and using advanced techniques might be outside your expertise.
- Time Commitment: Painting can be time-intensive, especially if you’re working on larger spaces or intricate areas like trim or ceilings.
- Equipment Costs: If you don’t already have tools like rollers, brushes, ladders, or drop cloths, purchasing these items could offset some of your savings.
- Potential Mistakes: Inexperience can lead to common issues such as uneven coverage, paint drips, or improper finish application.
Factors to Consider Before Choosing DIY
- Is it just one room, or are you repainting an entire house? Larger projects may be overwhelming for first-time painters.
- Are the walls in good condition? Prepping damaged surfaces (e.g., cracks or peeling paint) can add complexity to the task.
- Do you have sufficient time during evenings or weekends? Rushing through painting often leads to subpar results.
- Compare the total cost of materials for DIY against hiring professionals—especially for complex finishes like textured walls.
When Hiring Professionals Makes Sense
| Scenario | Why Hire Professionals |
| High Ceilings | Specialized equipment is necessary for safety and precision. |
| Historic Homes | Delicate materials require expert care during preparation. |
| Limited Time | Professionals often complete projects faster than amateurs. |
| Complex Techniques | Faux finishes or multicolor designs demand advanced skills. |
Tips for Successful DIY Painting
- Use high-quality paints that provide better coverage and durability.
- Invest in proper tools such as angled brushes for trim work and extendable rollers for ceilings.
- Prepare surfaces thoroughly by cleaning them and filling any holes or cracks.
- Test colors with small swatches before committing fully.
- Work in manageable sections to maintain focus and achieve consistent results.
By understanding your needs and limitations upfront—and planning accordingly—you’ll enhance both the efficiency and outcome of your next painting project.
- Finding the Best Painters Perrysburg OH for Interior and Exterior Painting Projects
- Everything New Homeowners Need to Know About Hiring a Painting Company Perrysburg OH
- House Painting Perrysburg OH: Techniques and Tools for Successful Home Projects
- How Often Should You Repaint Interior and Exterior Walls for a Fresh Look in House Painting Perrysburg OH
- 10 Important Factors Painters Perrysburg OH Recommend When Buying House Paint for Your Next Project
- Tips for House Painting Perrysburg OH: Proper Preparation and Maintenance
How Often Should You Repaint Interior and Exterior Walls for a Fresh Look in House Painting Perrysburg OH
Regular maintenance of painted walls is crucial not only for aesthetic purposes but also to ensure the durability of your home or building’s surfaces. Repainting schedules depend on factors such as the type of paint, environmental exposure, and the function of the space. Here’s a guide to help you determine when it’s time to repaint your interior and exterior walls.
Interior Walls
- These areas are typically low-traffic zones in most homes. If high-quality paints are used, they might only need repainting every 5-7 years. However, if bold or trendy colors were chosen initially, you may choose to refresh them more often for style updates.
- Adult bedrooms can go as long as 5-8 years without requiring a new coat if properly maintained. Children’s bedrooms, however, may need repainting every 2-3 years due to wall scuffs, fingerprints, or changing preferences as they grow older.
- These areas experience higher humidity levels (in bathrooms) and more exposure to grease or stains (in kitchens). It is recommended to repaint these rooms every 3-4 years using moisture-resistant paint or semi-gloss finishes.
- Being high-traffic zones prone to scratches and general wear-and-tear, hallways may need touch-ups or full repaints every 2-3 years. Using durable paint with washable surfaces can extend this timeline slightly.
Exterior Walls
Exterior walls face different challenges than interiors due to constant exposure to weather elements like sunlight, rain, snow, and fluctuating temperatures.
Factors that impact how often you should repaint exteriors include:
1. Type of Paint Used: High-quality acrylic paints last longer (7–10 years) compared to cheaper options. 2. Climate Conditions: Homes in areas with harsh sunlight may require painting every 5–7 years due to UV damage. Coastal properties subjected to salty air might need touch-ups even sooner. 3. Material:
– Wood siding: Requires painting approximately every 3–7 years unless it is stained instead of painted. – Stucco: Typically needs refreshing every 5–6 years depending on cracks or fading. – Brick: If painted rather than left natural, expect a lifespan of about 15–20 years before another coat might be necessary.
Signs It’s Time To Repaint
- Peeling or cracking paint
- Noticeable fading due to prolonged sun exposure
- Stains that cannot be removed through regular cleaning
- Mold growth in bathrooms or on damp exterior surfaces
- Chipped corners caused by accidental damage
Prolonging the Life of Your Paint Job
- Use high-quality primer before applying paint for better adhesion.
- Opt for washable finishes in high-touch areas like kitchens and hallways.
- Regularly clean painted surfaces using mild soaps appropriate for the finish type.
- Conduct annual inspections of exterior walls for cracks or mold growth so repairs can be made promptly before they worsen.
| Room/Area | Recommended Repaint Interval | Notes |
| Living Room | Every 5–7 Years | Consider trends if updating decor |
| Kitchen | Every 3–4 Years | Use semi-gloss/moisture-resistant paint |
| Bathroom | Every 3–4 Years | Watch for mold growth |
| Exterior (Wood) | Every 3–7 Years | Weatherproofing essential |
| Exterior (Stucco) | Every 5–6 Years | Repair cracks promptly |
Keeping up with repainting schedules not only enhances aesthetics but also protects your property from long-term damage caused by neglect over time.
Expert Painters Perrysburg OH: Eco-Friendly Solutions for Modern Spaces
Sustainability is no longer just a trend; it’s a necessity in modern design. With the growing awareness of environmental impact, eco-friendly paint solutions have become an essential choice for homeowners, businesses, and designers aiming to reduce their carbon footprint while creating beautiful spaces. Here’s how sustainable design with paint can shape modern spaces.
What to Look for in a Painting Company Perrysburg OH
- Low or Zero VOC (Volatile Organic Compounds): VOCs are chemicals that evaporate into the air, contributing to air pollution and potential health risks. Eco-friendly paints contain low or no VOCs.
- Natural Ingredients: Many sustainable paints use ingredients such as plant oils, clay, lime, or casein instead of synthetic chemicals.
- Recyclable Packaging: Environmentally conscious brands often package their products in recyclable or biodegradable materials.
- Non-Toxic Formulas: These paints avoid heavy metals like lead or mercury, ensuring safer use indoors and outdoors.
Eco-Friendly Interior & Exterior Painting Perrysburg OH Solutions
- Reduced chemical emissions improve indoor air quality.
- Safer for individuals with allergies or respiratory issues.
- Fewer toxins released into the atmosphere during manufacturing and application.
- Decreased landfill waste through biodegradable packaging.
- High-quality eco-paints often provide excellent coverage and longevity comparable to traditional options.
- Using eco-friendly materials can help buildings achieve certifications like LEED (Leadership in Energy and Environmental Design).
Types of Eco-Friendly Paints
| Type | Key Features | Best For |
| Low/Zero VOC Paint | Minimal odor; safer indoor air | Homes, offices, schools |
| Milk Paint | Natural ingredients; matte finish | Furniture, rustic interiors |
| Clay-Based Paint | Non-toxic; breathable wall surfaces | Heritage buildings, bedrooms |
| Recycled Paint | Made from unused/residual paint | Budget-conscious renovations |
Tips for Incorporating Sustainable Design with Paint
- Prioritize Proper Disposal: Ensure leftover paint is recycled or donated responsibly rather than discarded in landfills.
- Focus on Longevity: Select high-quality paints that require fewer touch-ups over time to reduce waste.
- Use Light Colors Strategically: Lighter shades reflect more sunlight, reducing reliance on artificial lighting and lowering energy consumption.
- Work with Certified Professionals: Look for painters experienced in sustainable practices who understand non-toxic application techniques.
Choosing the Right Brand
- Benjamin Moore (Natura Collection)
- Sherwin-Williams (Harmony Zero VOC)
- ECOS Paints
- Clare
Sustainable design with paint is no longer a niche concept but a cornerstone of responsible living and working environments. By consciously choosing environmentally friendly options and implementing thoughtful practices during your next project, you can contribute meaningfully toward preserving our planet while crafting stunning spaces tailored to modern needs.
Brand Identity Through Paint: Creating a Cohesive Look for Your Commercial Space
Establishing a strong and cohesive brand identity is essential for any commercial space. One of the most impactful yet often overlooked tools to achieve this is paint. The colors and finishes you choose can significantly influence how your brand is perceived by customers, employees, and stakeholders. Below, we explore strategies and considerations to help you create a cohesive look using paint in your commercial space.
The Role of Color in Branding
- Emotional associations: Colors evoke certain emotions—for example:
- Blue conveys trust and professionalism.
- Red symbolizes energy and passion.
- Green represents growth and sustainability.
- Brand recognition: Consistent use of your brand’s primary colors strengthens recognition across all physical spaces.
- Cultural significance: Consider cultural perceptions of color, especially if your business operates globally.
Strategies for Creating Cohesion
- Standardize Your Color Palette
Select a few core colors that align with your brand’s identity. Implement these throughout the commercial space for consistency. Complementary shades can be used sparingly as accents to maintain visual interest without overwhelming visitors. - Incorporate Logo Colors
Use the exact shades from your logo throughout the space—on walls, trims, or even furniture—to reinforce brand association. - Utilize Zone-Specific Color Pairings
Different areas of the building can serve distinct purposes (e.g., meeting rooms versus recreational areas). Adjust tones or intensities within the same palette to reflect functionality: - Meeting rooms: Neutral tones with subtle accents to encourage focus.
- Lounges or break areas: Softer pastels to foster relaxation.
- Leverage Paint Finishes for Texture Mixing matte with gloss or satin finishes adds layers of depth while maintaining cohesion across spaces.
Examples of Brand-Driven Commercial Spaces
| Industry | Common Color Choices | Purpose/Effect |
| Technology | Blue, Gray | Promotes trustworthiness & innovation |
| Retail | Bright Red, Yellow | Conveys energy & grabs customer attention |
| Healthcare | Soft Green, White | Suggests cleanliness & calmness |
| Hospitality | Earth Tones (Brown, Beige) | Evokes warmth & comfort |
Practical Tips Before Painting
- Durability Matters
Opt for high-quality paints that stand up to wear and tear from high foot traffic while retaining their vibrancy over time. - Lighting Considerations Test how paint colors appear under different lighting conditions—natural versus artificial light can change their appearance dramatically.
- Professional Consultation Work with professional painters or designers familiar with commercial spaces; they can ensure proper application techniques and execution.
By using paint strategically as part of your branding efforts, you not only create an aesthetically pleasing environment but also reinforce the values and vision behind your company’s identity at every touchpoint within the physical space.
The Impact of Color Choices on Employee Productivity and Well-Being in Office Spaces
The colors used in office spaces can have a profound effect on employee productivity, mood, and overall well-being. Carefully selecting the right hues for your workspace can foster creativity, reduce stress, and promote focus. Here’s a comprehensive guide to understanding the impact of color choices in office environments.
How Colors Affect Emotions and Behavior
- Blue: Known for its calming properties, blue helps reduce stress and can improve focus. It is ideal for spaces requiring concentration, like meeting rooms or private offices.
- Green: Associated with balance and harmony, green is easy on the eyes during long work hours. It works well for creative brainstorming areas or coworking zones.
- Yellow: Often linked to optimism and energy, yellow stimulates creativity but should be used sparingly to avoid overwhelming employees.
- Red: A high-energy color that increases heart rate and excitement. Red works best as an accent rather than a dominant shade in workplaces.
- Neutral tones (gray, white, beige): These create a clean, modern look but should be paired with accents of brighter colors to prevent feelings of monotony or blandness.
Matching Colors to Work Functions
| Office Area | Suggested Color Palette | Purpose |
| Reception Area | Warm neutrals with bold accent walls | Creates an inviting first impression |
| Conference Rooms | Blues or greens | Encourages calm yet productive discussions |
| Break Rooms | Bright yellows or oranges | Promotes energy and social interaction |
| Workstations | Soft blues or greens | Enhances focus while reducing eye fatigue |
Enhancing Well-Being Through Strategic Design
- Natural Light Integration
Combine your chosen colors with ample natural light to create an open and uplifting atmosphere. Lighter shades tend to reflect sunlight better, making rooms feel more spacious. - Biophilic Design Elements
Pair restful shades like green with natural elements such as indoor plants or wooden furniture to promote relaxation and connection with nature. - Accent Walls for Inspiration
Use bold colors like yellow or orange as accent walls in collaborative zones to stimulate brainstorming sessions. - Avoid Overstimulation
Overuse of bright hues like red or neon shades can lead to overstimulation or anxiety among employees. Maintain balance by incorporating neutral tones as a base color.
The Importance of Employee Input
Engaging employees in the design process ensures that their preferences are considered when creating an optimal work environment. For example: – Conduct surveys to determine favorite color schemes. – Test different palettes before committing fully.
By aligning aesthetics with functionality through thoughtful color choices, businesses can create a space that fosters both productivity and employee satisfaction while reflecting the company’s unique culture effectively.
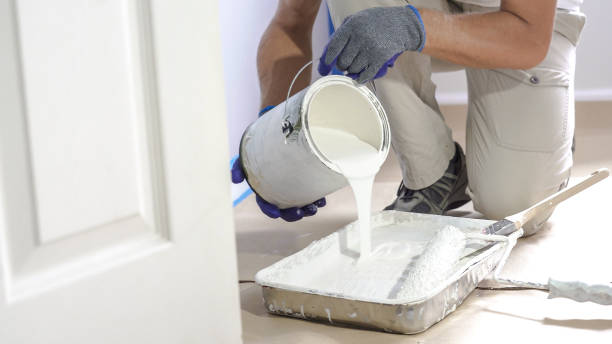
A Quick Guide to Compliance and Safety Standards in Painting Commercial Properties
Painting commercial properties involves more than just aesthetic considerations. It requires adherence to compliance and safety standards to ensure the well-being of workers, tenants, and visitors while meeting legal obligations. Below is a comprehensive guide to understanding these requirements and implementing them effectively.
Importance of Compliance in Commercial Painting
- Legal Obligations: Failure to comply can result in fines, work stoppages, or legal action.
- Health & Safety: Proper safety measures protect workers from exposure to harmful chemicals or accidents.
- Environmental Responsibility: Compliance ensures minimal environmental impact through the use of eco-friendly products or proper disposal methods.
- Reputation Management: Businesses that value safety bolster their credibility with clients and stakeholders.
Key Compliance Considerations
- Use paints that comply with VOC (Volatile Organic Compound) limitations as outlined by local authorities.
- Ensure proper labeling of paint containers as per OSHA Hazard Communication Standards.
- Provide Material Safety Data Sheets (MSDS) for all paint products used on-site.
- Equip workers with appropriate PPE (Personal Protective Equipment), such as gloves, goggles, respirators, and protective clothing.
- Conduct site-specific training programs on the safe handling of hazardous substances.
- Limit worker exposure time when using products with strong fumes or chemicals.
- Arrange for the safe disposal of leftover paint, thinners, and cleaning agents in alignment with local waste regulations.
- Avoid improper drainage into water systems by using designated collection points.
- Verify that fire-resistant coatings are used where required by building codes.
- Maintain clear evacuation routes throughout the painting process.
- Environmental Certification Standards: | Certification Name | Purpose | Example Benefits | |——————–|———|——————| | LEED (Leadership in Energy and Environmental Design) | Encourages eco-friendly material usage | Improved energy performance | | Green Seal Certification | Focused on low-toxicity paints | Healthier indoor air quality for occupants |
Steps to Ensure Safe Practices on Commercial Sites
- Conduct a pre-project hazard assessment to identify potential risks associated with the property or materials being used.
- Develop an emergency response plan inclusive of spill management procedures and first aid guidance.
- Work during non-operational hours to minimize disruptions and reduce potential harm to building occupants.
- Regularly inspect scaffolding setups or other elevated platforms for stability before each use.
Common Industry Standards You Should Know
- OSHA (Occupational Safety and Health Administration): Ensures worker protection through regulations like hazard communication or respiratory protection programs.
- EPA (Environmental Protection Agency): Regulates emission levels from paints containing VOCs while advocating sustainable practices.
- NFPA (National Fire Protection Association): Specifies requirements related to fire-resistant materials on commercial properties.
By integrating these standards into your project workflow, you’ll not only mitigate risks but also demonstrate professionalism in delivering high-quality outcomes within compliant frameworks.
With careful planning, knowledge of regulatory frameworks, and consistent monitoring throughout execution phases, meeting compliance standards becomes an integral part of every successful commercial painting project—ensuring both legal safety requirements are met along with enhanced operational efficiency within spaces painted professionally.
- Finding the Best Painters Perrysburg OH for Interior and Exterior Painting Projects
- Everything New Homeowners Need to Know About Hiring a Painting Company Perrysburg OH
- House Painting Perrysburg OH: Techniques and Tools for Successful Home Projects
- How Often Should You Repaint Interior and Exterior Walls for a Fresh Look in House Painting Perrysburg OH
- 10 Important Factors Painters Perrysburg OH Recommend When Buying House Paint for Your Next Project
- Tips for House Painting Perrysburg OH: Proper Preparation and Maintenance